Use Node.js in Cloud Sites
Cloud Sites now has a website framework that uses Node.js to allow quicker load time and faster viewing capability of your websites. In order to use Node.js, you need to use an Integrated Development Environment, or IDE. This is a software application that consists of a source editor, build automation tools and a debugger. Two common IDE’s used for Node.js developers are WebStorm and Visual Studio. Using either one of these IDE’s allows developers to create sites through your Cloud Sites control panel. This article will walk you through how to utilize these IDE’s and create websites with Node.js from your Cloud Sites control panel. Click on the link below to be directed to the instructions for the IDE you are using:
What is Node.js?
Node.js is an open-source JavaScript run-time environment for executing scripts on the server side. Traditionally, JavaScript is embedded in a website’s HTML and run client side by a JavaScript engine in the user’s web browser. Node.js enables JavaScript to run server side to produce dynamic web page content before the page is sent to the web browser. You can learn more about Node.js on their website.
Using WebStorm
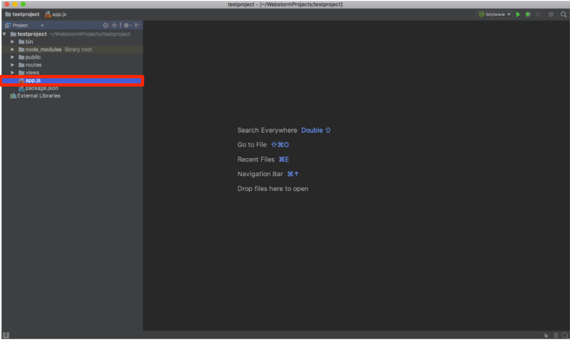
After you download and install WebStorm, you will need to create a project. For this example, I am selecting Node.js Express App as the project type.
- Open app.js and add the following code prior to exporting the app:
app.listen(process.env.PORT || 3000, function() {
console.log('Example app listening on port 3000!')})

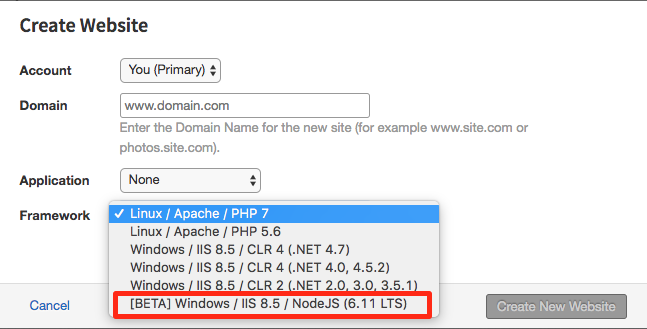
- Next, create your Node.js webpage. From your Cloud Sites control panel, create a website, selecting “[BETA] Windows/IIS8.5/NodeJS” as the framework.
Framework Missing
If this framework is not available in the drop down menu of your control panel, contact your Support team to have it enabled. 
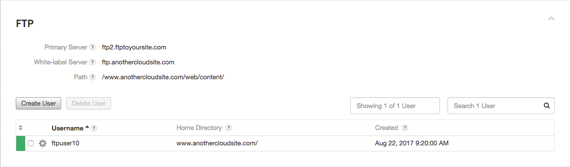
- After the site is created, you will need to create your FTP user in your control panel. If you’re unsure how to create a user, see our article Creating FTP Users for instructions.

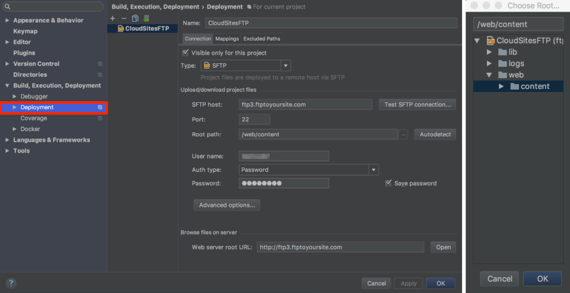
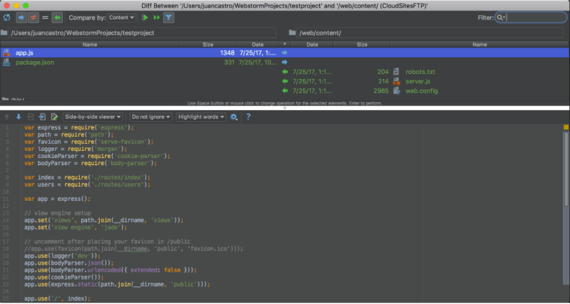
- Add the host and server into a new deployment setting in WebStorm. Choose the “…” to allow initial connection and get a list of directories. Set your default to /web/content/.

- Create a directory mapping based off your local directory and not /web/content/ then proceed to synchronize.
Synchronize
You will want to bring over the server.js and web.config then click Synchronize All. Depending on the number of files in your site, this step can take a few moments to complete 
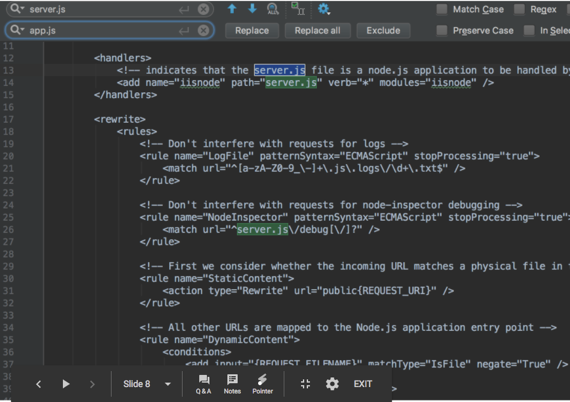
- Do a quick find & replace, exchanging server.js with app.js.

- Upload the files you’ve modified to your FTP location by right clicking on them and selecting Upload to $locationname. Now you’ve created your Node.js website and it’s ready for you to code away!
Using Visual Studio
Visual Studio 2017 |
| In this example, we are using Visual Studio 2017, instructions for download can be found here: www.visualstudio.com/vs/node-js/ |
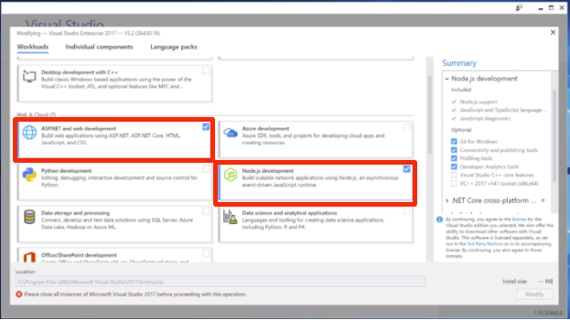
- To use Node.js in Visual Studio 2017, you will need to enable the extension via the installer. Select the check boxes in the sections named ASPNET and web development and Node.js development.

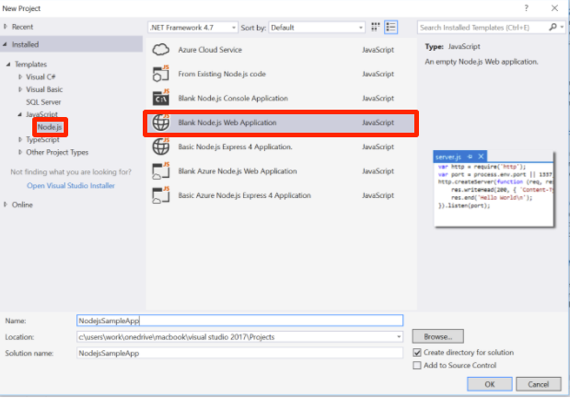
- Create a new project, and select the Node.js template from the JavaScript subsection.

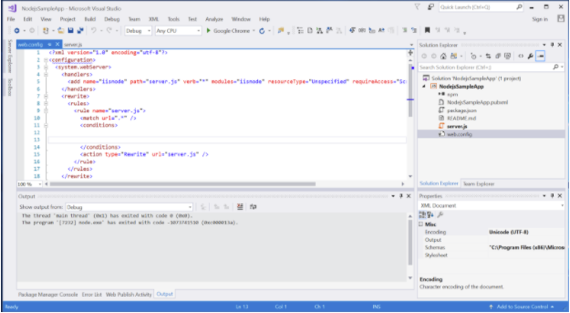
- Microsoft, by default, does not provide a web.config, be sure to add one so publishing will work. Below is an example template:
<?xml version="1.0" encoding="utf-8"?>
<configuration>
 <system.webServer>
  <handlers>
   <add name="iisnode" path="server.js" verb="*" modules="iisnode" resourceType="Unspecified" requireAccess="Script" />
    </handlers>
     <rewrite>
      <rules>
      <rule name="server.js">
     <match url=".*" />
     <conditions>


     </conditions>
     <action type="Rewrite" url="server.js" />
    </rule>
   </rules>
  </rewrite>
 </system.webServer>
</configuration>

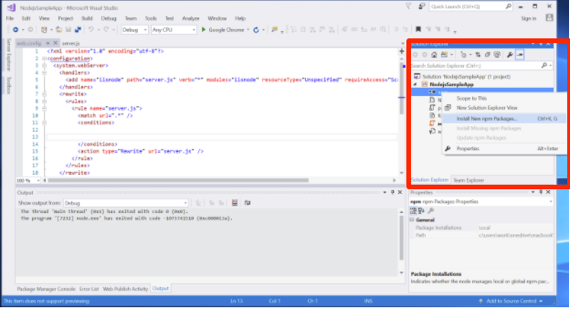
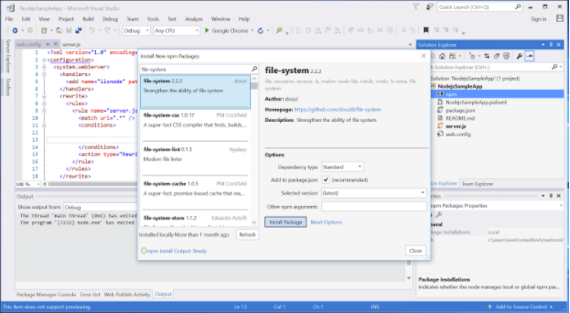
Installing NPM Packages
If you’d like to make use of NPM packages, Visual Studio supports this. You need to right click NPM in the solution explorer and select Install New npm packages. Once you’ve clicked Install New npm Packages, you can search for an install using the search function in Visual Studio.

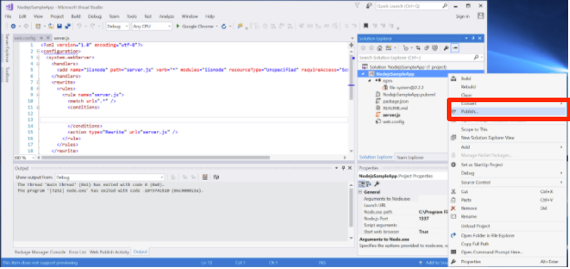
- Once you’re ready to publish, right click on the Node.js project in the solution explorer and select Publish.
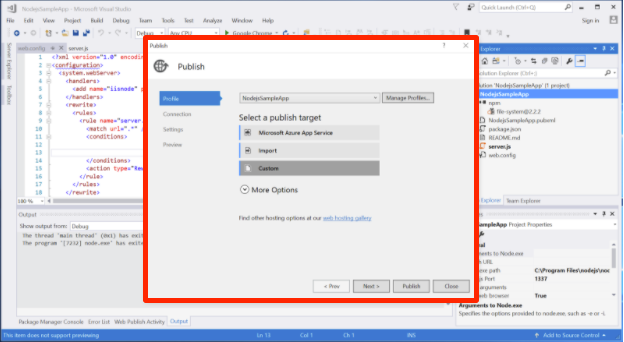
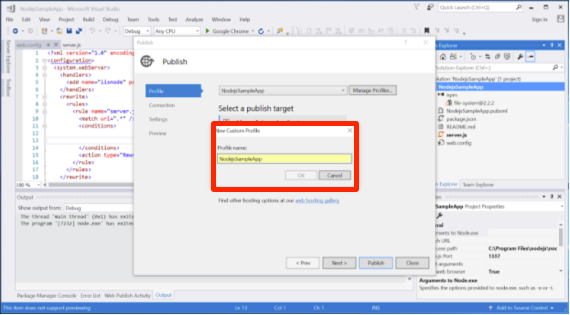
- To publish via FTP, you will need to create a Customer Publish Profile by selecting Custom and entering the profile details.

- Select FTP as the publish method and provide the correct FTP user information.
Warning:
Visual Studio does not support SFTP. - After you’ve input your FTP information and it has validated, you will see the final configuration screen which lets you select to publish a debug or release version of your application.

- Click Publish and wait for FTP to upload your Node.js to your site.