Assign Read-Only Permission for a Database User in Cloud Sites
Limit user access and secure your Cloud Sites data. Learn how to easily assign read-only permissions for your MSSQL and MariaDB database users.
You can easily limit access to database users that you don’t want to have permissions to change the content of your database. Regardless if you have MSSQL or MariaDB (MySQL), you have this functionality in just a few simple steps. For information on the different types of permissions, see our article What Are File Permissions?.
This article will walk you through file permissions in MSSQL and MariaDB. Click on the link below to be directed to the correct database you are using.
MSSQL
- First, log into myLittleAdmin to access the users for your MSSQL database.

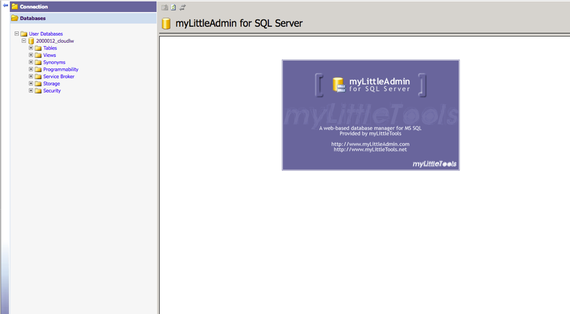
- Expand your database by clicking the [+] Plus sign next to it.

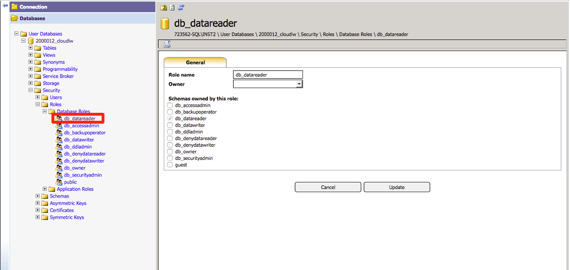
- Using the [+] plus sign, expand the Security>>Roles>>Database Roles section.

- Select db_datareader from the Database Roles.
- The db_datareader role will open in the screen to the right of the database menu.
- Click on the Owner menu. A drop down will appear for you to select the database user to assign to the datareader role.

- Click Update to save the permissions change. You have now given the user read-only access to your database, and they will show in the Database Roles as the Owner.


MariaDB
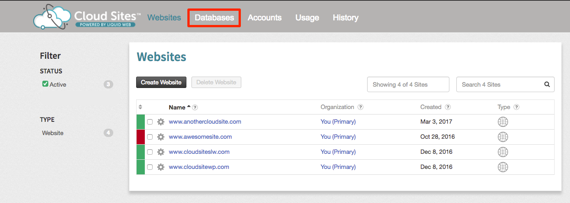
- Log into your Cloud Sites Control Panel.
- Click on the Databases link in the menu and click on the link for the database you want to change user permissions for.

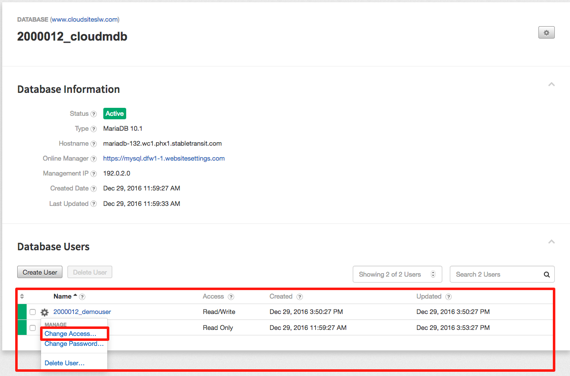
- The Database Information section will open, click on the gear icon next to the database user’s name. A drop-down will appear.
- Select Change Access to change the file permissions for the user.

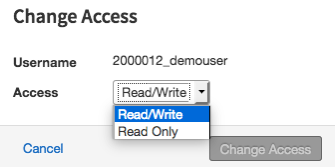
- A pop-up will appear for you to change the user permissions. Use the drop-down to select Read/Write or Read Only access. To save the change, click Change Access in the pop-up.

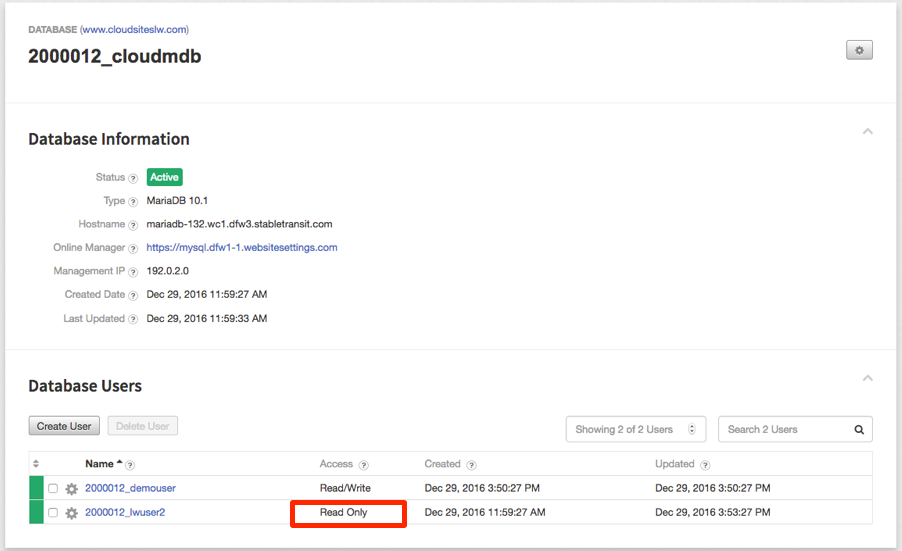
- Once the change is complete, a green success message will show at the top of your control panel page and the Access section will show Read Only for that user.