Configure Cloud VPN on Windows
Using a VPN to connect to your server? Liquid Web offers a cloud vpn solution for connecting to your server securely. Get directions for installing and configuring the VPN client on a Windows desktop.
Once you create your Cloud VPN, the next step is to configure it so that you can connect securely from anywhere. This tutorial walks you through configuring your VPN on your Windows operating system.
Tip
We recommend using the Cisco AnyConnect Client. The setup is simple and reliable. If for some reason you have trouble using the Cisco Client, you can also try the ShrewSoft client shown later in the article. Only one client is required for your VPN connection.
Setup the Cisco AnyConnect Client
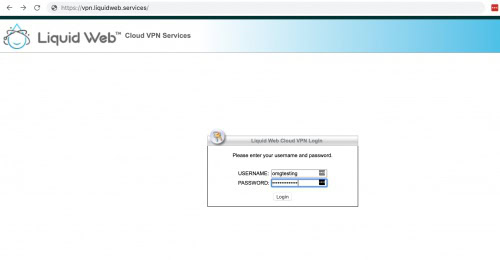
- Open https://vpn.liquidweb.services on any browser on your workstation. Enter the credentials you created for your VPN user. If you need to create a VPN user, see Setting Up Your Cloud VPN.
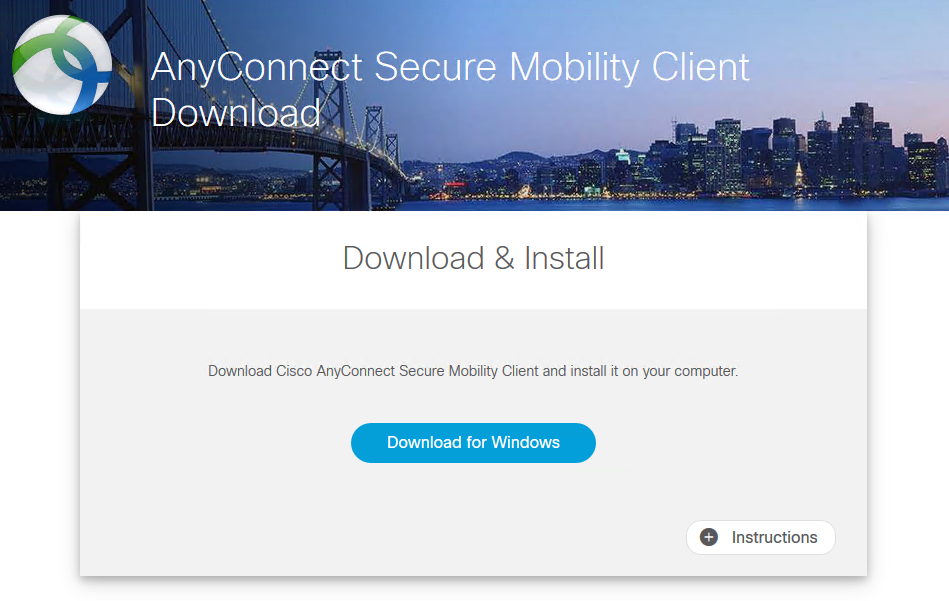
- Click the Download button to download the client on your workstation (the installer will detect which version of the software you need). Run the installer.
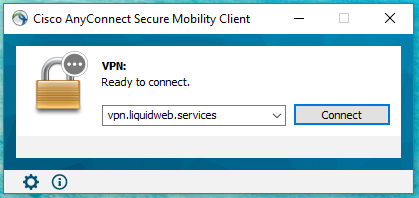
- Open the AnyConnect client. Enter vpn.liquidweb.services into the AnyConnect client.
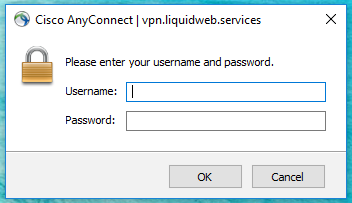
- Enter the username/password you created for the VPN user. Then click OK.
That’s it! You’re now connected to your Liquid Web Cloud VPN and can securely access your server.
Setup the ShrewSoft Client
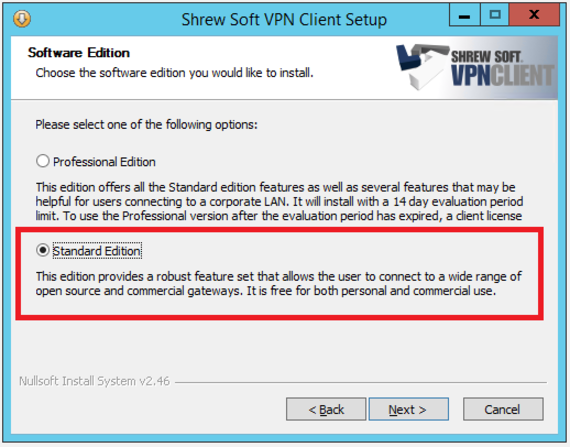
- Once the software is downloaded, you will be prompted to choose a Professional Edition or a Standard Edition. Select the Standard Edition to avoid additional charges for licensing. You will still have the same functionality and be able to connect via VPN.

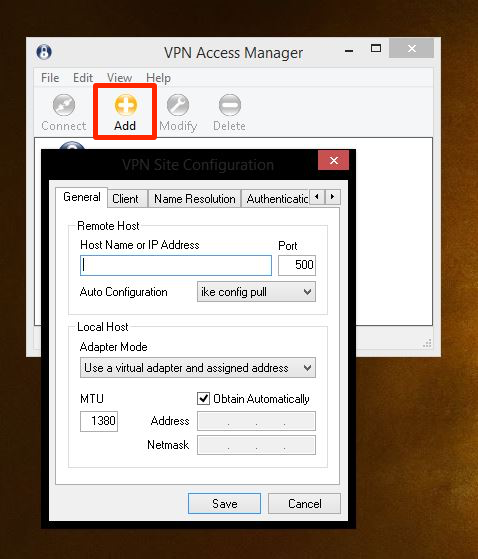
- After Shrew Soft has been downloaded, click on the VPN Access Manager icon on your desktop. Click on Add to open your VPN Configuration settings.

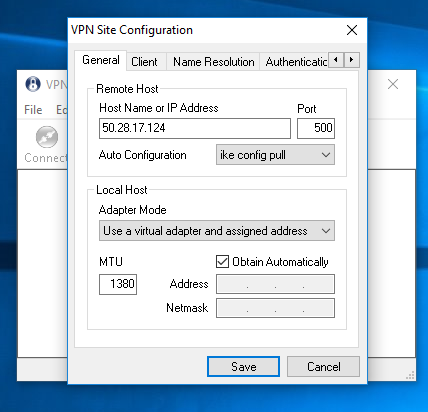
- Enter the IP Address 50.28.17.124 in the Host Name or IP Address section.
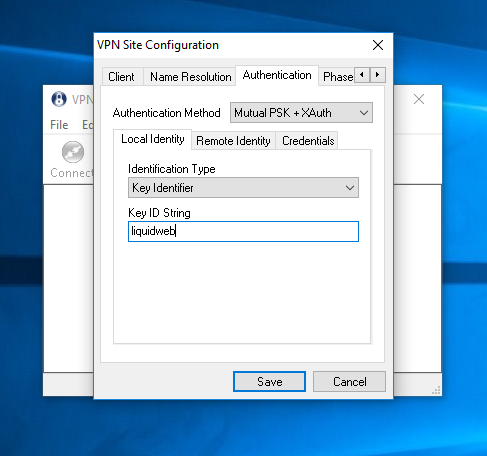
- Click on Authentication tab. Enter the Key ID String liquidweb.
- Click Save and navigate to the Credentials tab.
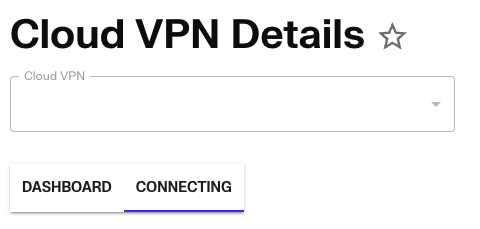
- Make sure the Authentication Method is set to Mutual PSK + XAuth and enter the Pre Shared Key (Group Password) that you can find in your account. The Group Password can be found by clicking on the Cloud VPN under Services, then clicking “Connecting”.
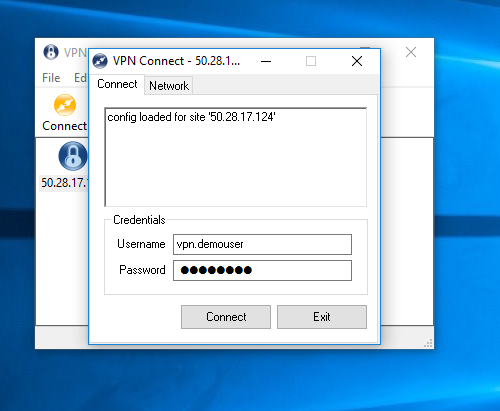
- Click Save. The VPN will now show in VPN Access Manager and you can double-click the icon to open the VPN.
- Login with your username and password and click Connect.
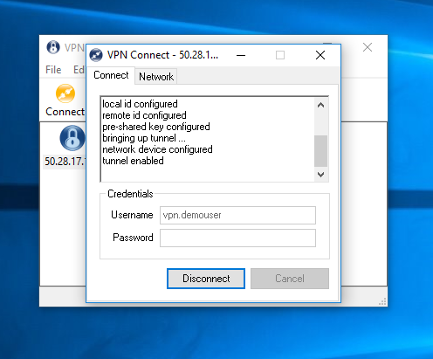
- You will see that your VPN is now connected.
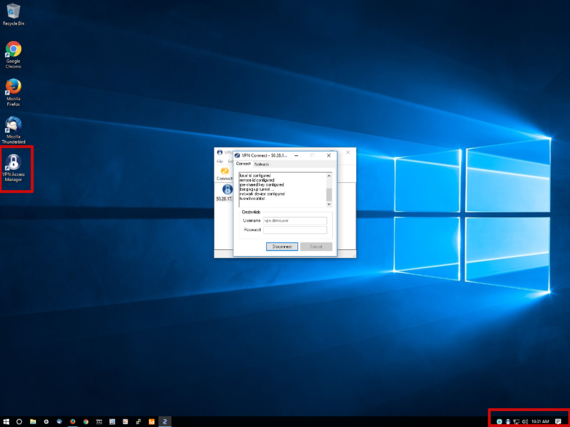
- Once the VPN is configured an icon will show on your desktop. An icon will appear in the lower right-hand section of your desktop to show that it is active and connected.