WordPress Upgrade and Downgrade
Overview
This guide covers how to upgrade or downgrade WordPress using various methods, including WP-CLI, Softaculous, and the WordPress Dashboard. It also includes troubleshooting tips for common update errors and how to enable verbose logging for debugging.
Always create a full backup of your site files and database before performing an upgrade or downgrade.
Methods to upgrade or downgrade WordPress
1. WP-CLI (Recommended)
Upgrade WordPress
- Log in to the server via SSH.
- Switch to the user that owns the WordPress install:
su - username - Navigate to the WordPress root directory:
cd /path/to/wordpress - Run the following command:
wp core update
Downgrade WordPress
- Log in to the server via SSH.
- Switch to the user that owns the WordPress install:
su - username - Navigate to the WordPress root directory:
cd /path/to/wordpress - Specify the version you want to downgrade to:
wp core update --version=x.x.x --force
Replace x.x.x with required version, example:wp core update --version=6.1.1 --force
2. Softaculous (If WordPress was installed via Softaculous)
Upgrade WordPress
- Log into your cPanel account.
- Go to Softaculous Apps Installer.
- Select your WordPress installation.
- If an update is available, click the blue update arrows.
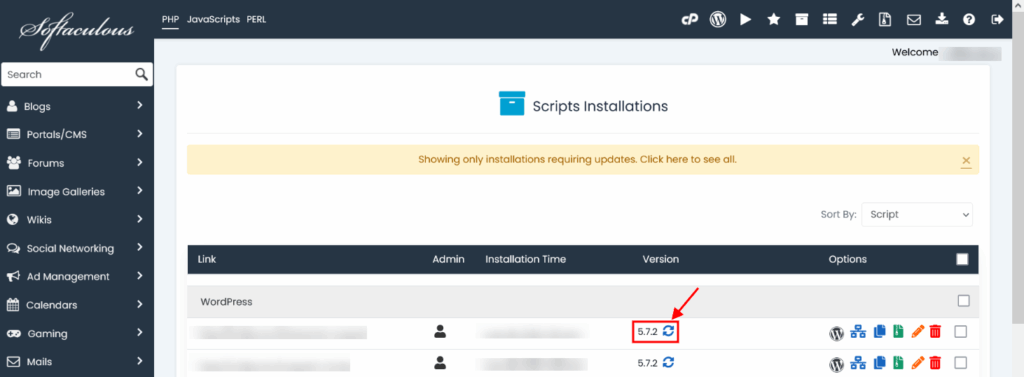
5. Create a backup when prompted.
Downgrade WordPress
Downgrading is not supported directly in Softaculous. Use WP-CLI or manual methods instead.
3. WordPress dashboard
Upgrade WordPress
- Log into your WordPress Admin area.
- If an update is available, you will see a notification at the top.
- Click Please update now to begin.
- WordPress will download and install the update.
Update plugins and themes before performing the core update to minimize compatibility issues.
Downgrade WordPress
Downgrading is not supported directly from WordPress dashboard. Use WP-CLI or manual methods instead.
Troubleshooting common issues
General update errors
Symptom: “The update cannot be installed because we will be unable to copy some files.”
Causes:
- Incorrect file permissions
- Disk space issues
Fixes:
- Check PHP handler:
/usr/local/cpanel/bin/rebuild_phpconf --current - Ensure correct ownership and permissions:
- Files:
644 - Directories:
755 - Ownership:
user:user
- Files:
- Check available disk space:
df -h - Remove leftover
.maintenancefile from root if stuck in maintenance mode.
Download failed
Symptom: Download failed. error:0D0890A1:asn1 encoding routines:func(137):reason(161)
Cause: Old OpenSSL version unable to verify SHA-256 certificates.
Solutions:
- Move the site to a modern hosting environment.
- Manually update WordPress via FTP.
Fatal Error: Undefined function during update
Symptom: Corrupt files cause fatal errors post-update, especially blocking wp-admin access.
Fix:
- Download the latest WordPress installation package from wordpress.org.
- Extract and replace core directories (
wp-admin,wp-includes) via FTP. - Visit
/wp-adminin a browser to trigger database updates.
Always verify backup functionality before making any replacements.
Enable debug logging
To capture more detailed logs during updates:
- Open
wp-config.php - Add these lines near the top:
define('WP_DEBUG', true);
define('WP_DEBUG_LOG', true);
define('WP_DEBUG_DISPLAY', true);
error_reporting(E_ALL);
ini_set('display_errors', 1);
3. Logs will be written to wp-content/debug.log
If Apache can’t write to debug.log, create it manually with 666 permissions.
Summary
Upgrading or downgrading WordPress is a critical task that requires care and preparation. WP-CLI is the most efficient tool for version management, while Softaculous and the dashboard offer convenient UI-based options. Always back up your site, check for compatibility, and troubleshoot carefully using this guide and also take assistance of your development team.