Allowing Port Access by IP Address in CSF
Note: |
| This walkthrough is for Linux servers with cPanel and CSF. You will need to log into the server as root. |
Ports are like tiny holes in your firewall that let certain things reach your server. It’s important to have the ports open that you need, but also to not leave extra ports open. Having extra ports open leaves your server vulnerable. The best practice is to start with all the ports closed and then only open the ones you need. When you set up your server, some ports are automatically opened to make your server work. These include port 53, which lets DNS traffic through. (Without DNS, you’d have no websites at all!)
What if only one IP needs to access a firewall port? For example, you have one developer you want to be able to access FTP. Or you have a few IPs that need to access MySQL remotely. CSF allows you to keep a port closed but still let specific IPs connect to that port.
This tutorial assumes you will be allowing access for a specific IP address (or set of IP addresses) through an already closed port. If the firewall port isn’t already closed, following this tutorial won’t actually change anything. Follow the tutorial Opening and Closing Firewall Ports to make sure the necessary ports are closed before continuing.
- Log into WHM (if you need help logging in to WHM, see Getting Started with WHM).
- You can find the location of your firewall in two places:
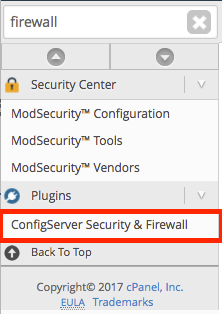
- In the left search bar, type firewall. Select ConfigServer Security & Firewall in the menu.

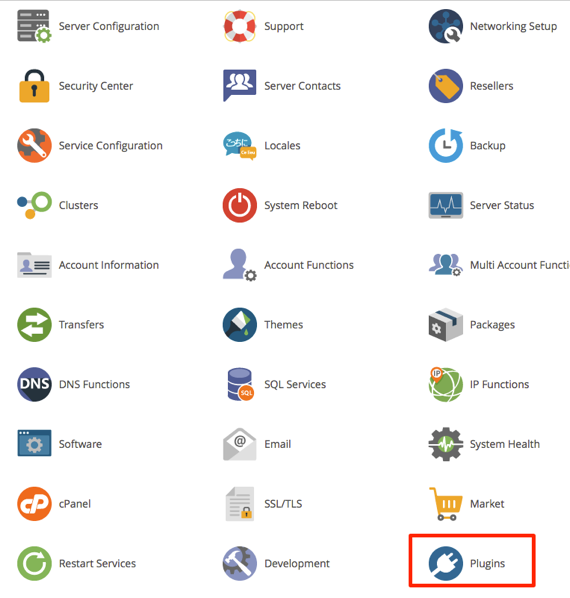
- Under Plugins, click on ConfigServer Security & Firewall.

- In the left search bar, type firewall. Select ConfigServer Security & Firewall in the menu.
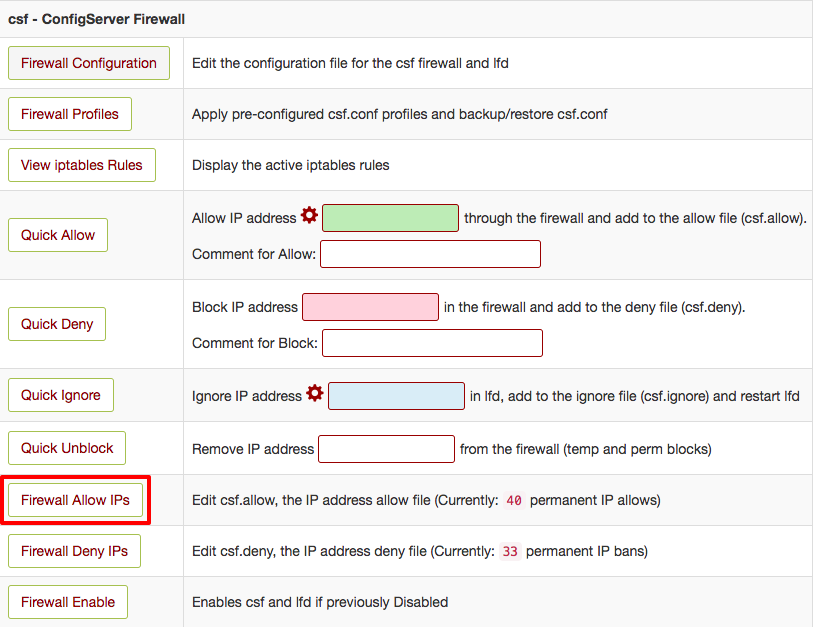
- Scroll down to the csf – ConfigServer Firewall section. Click on Firewall Allow IPs.

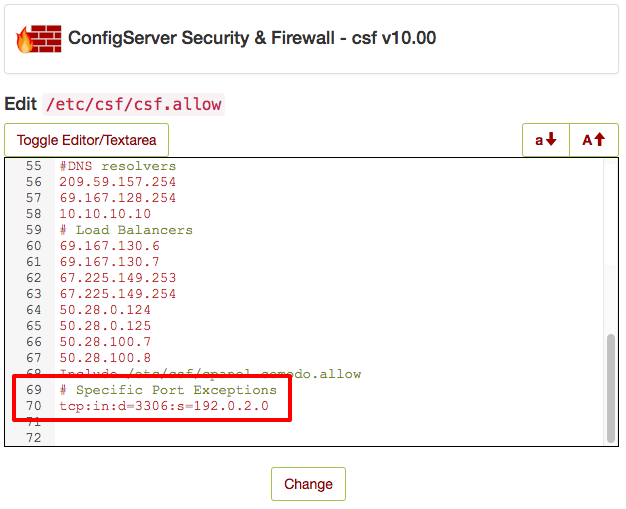
- This is the content of your csf.allow file. Normally, you’d add IP addresses to this list if you want those IPs to always be allowed through your firewall, no matter their activity. Allowing IP addresses through specific ports follows the same idea, but you need a little more syntax. You’ll use this syntax:
protocol:in:d=port:s=IP
You’ll replace “protocol” with the protocol, “tcp,” “udp,” or “icmp” (TCP is used by HTTP, so you will most likely be using TCP), “port” with the port number, and “IP” with the IP address or range. So if we want to allow IP address 192.0.2.0 to access MySQL on port 3306, add this to the csf.allow file.
tcp:in:d=3306:s=192.0.2.0
Tip:
Use the # character to write a comment about these special IP rules so you if you’re making edits later, you’ll know why you allowed those IPs. 
- You can enter as many of these rules as necessary. Once you’re done, click Change.
- Restart CSF to make sure your changes are enacted by clicking Restart csf+lfd. Once you’ve restarted your firewall, you’re all set!