Adding Cloud Block Storage on a Windows Server
Cloud Block Storage (CBS) offers extra storage for your Cloud Server. It's a raw block device, allowing you to format it as needed for your server's requirements, though it requires minimal setup.
Introduction
Cloud Block Storage (CBS) provides additional hard drive space for your Cloud Server with just a few clicks. The space is not pre-formatted; rather, it is a raw block device. The simplicity of providing a raw block device on the cloud means that you can mount and format the space on your server however you would like, with whatever filesystem is appropriate for your needs. This does entail a small amount of work getting the space into a usable state.
Step by step instructions
Create the Volume
- The first step when adding block storage to Windows is the same as with a Linux server: create the volume, and attach it to the server in the manage interface (see Setting Up Cloud Block Storage).
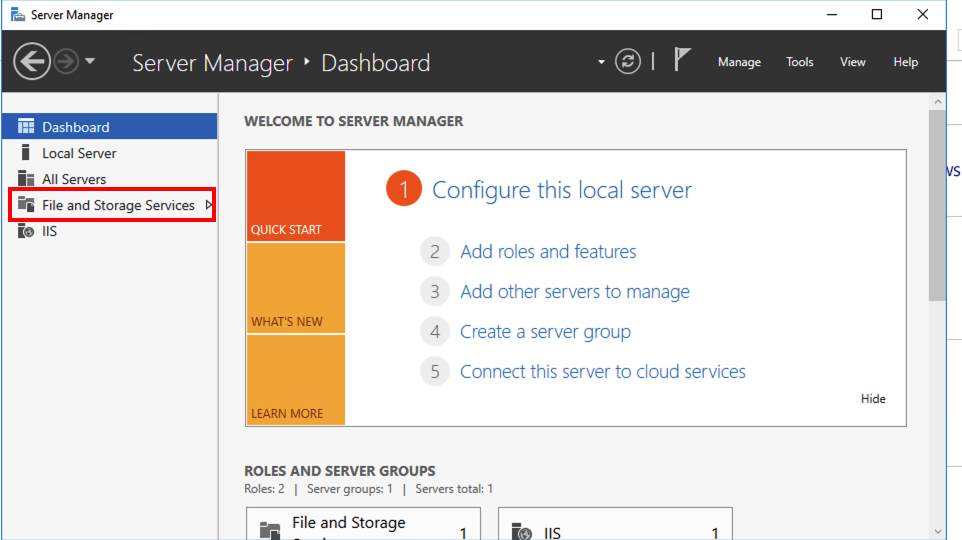
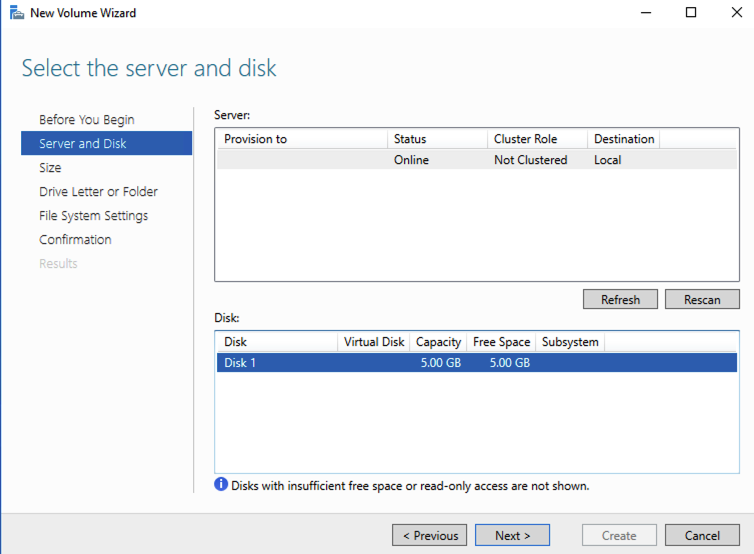
- Next, bring the disk online by launching the Server Manager (next to the start button) and select File and Storage Services.

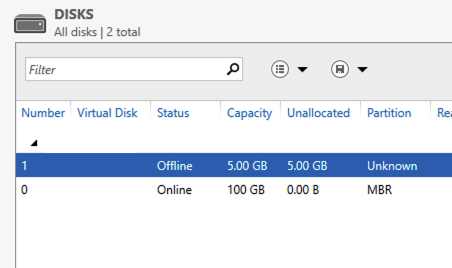
- Select the new volume (it will be offline).
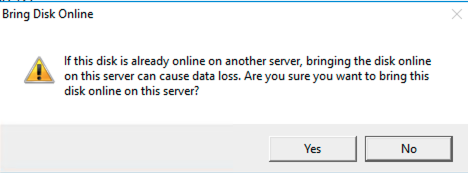
- Right click on the new Disk and select Bring Online. A warning will pop up about not using the disk with multiple servers. Click Yes to continue.


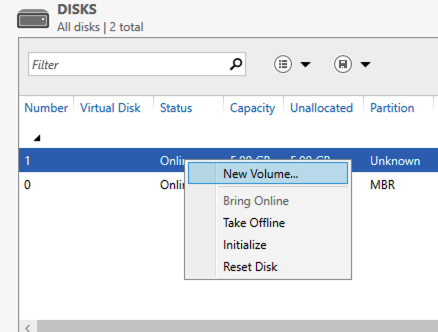
- Right click again on the new disk and select New Volume. If you are using a disk larger than 2TB you will want to choose GPT; otherwise you can simply confirm to initialize the disk.

- Click Next through the welcome page.
- Select the new disk to be used in creating the new volume. Click Next to continue
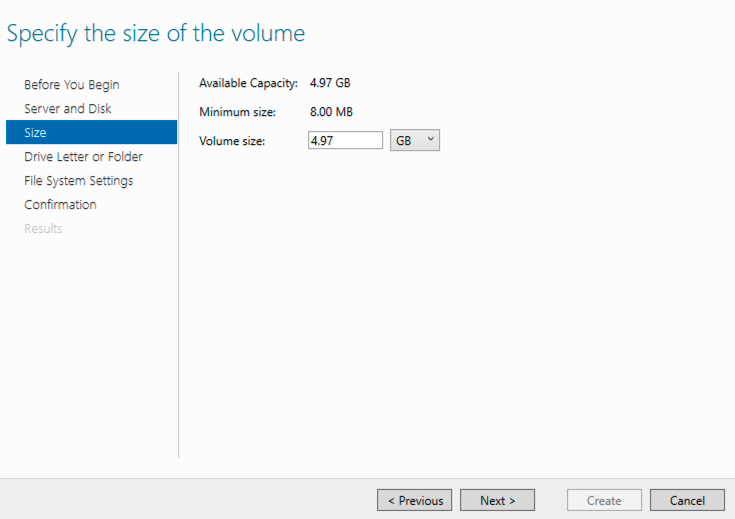
- On Specify Volume Size you can specify a volume size other than the default. By default, it selects the entire disk.
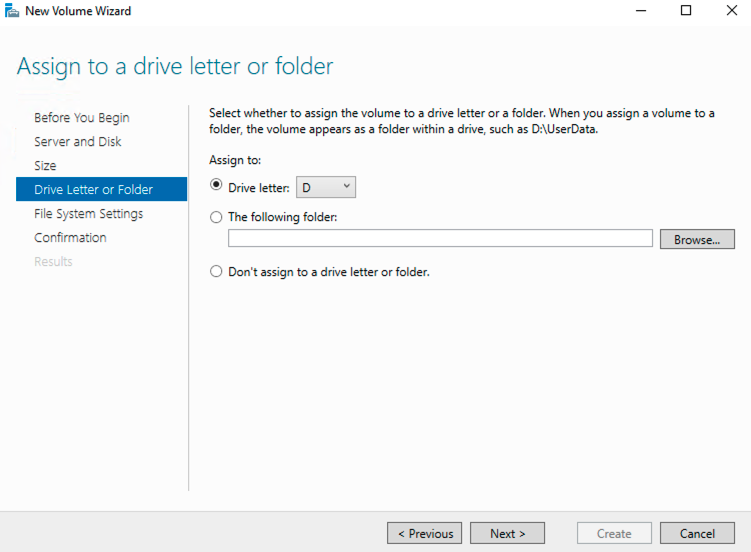
- Select the drive letter for the new volume.

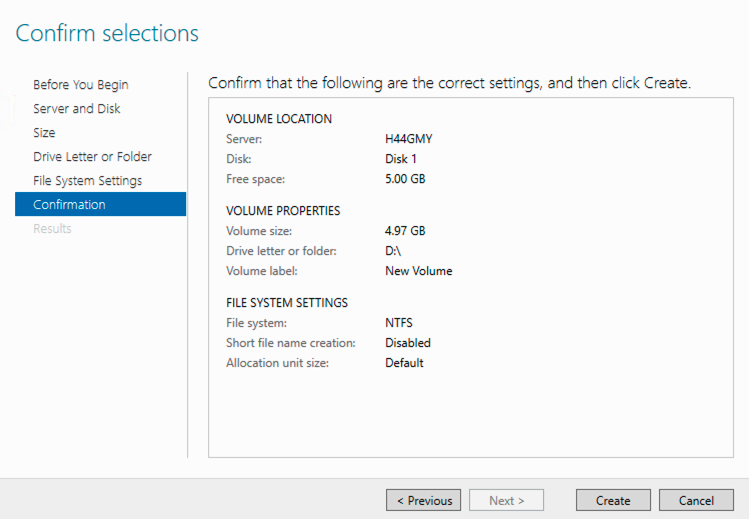
- Now you can assign a label and other settings. Apart from specifying a Volume Label, the default settings should suffice.
- Click Next to go to the confirmation screen. Click Create to finish creating the disk.

Detaching a Windows Drive
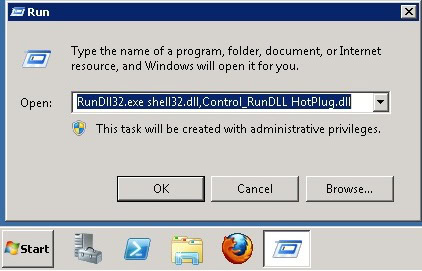
- As with Linux, your volume must be unmounted before it can be detached in the manage interface. Make sure you are unmounting the correct drive by running the following command from the terminal (accessible at Start > Run Command):
RunDll32.exe shell32.dll,Control_RunDLL HotPlug.dll
| The system will prevent you from removing the C: SCSI controller. |
- Approve the Safe to Remove Hardware popup. It is now safe to detach the SBS from your manage interface.
