

 Dominic Nixon
 Key takeaways
- PyCharm installation on Windows starts with downloading the unified installer from JetBrains and choosing whether to use free core features or PyCharm Pro.
- PyCharm can be installed before Python, but you still need Python installed before you can run Python projects.
- The installer is only part of the setup; first launch and interpreter selection matter too.
- The setup is working once you can create a project, select an interpreter, and run a Python file.
PyCharm is a widely used IDE, or integrated development environment, for Python that runs on Windows, Linux, and macOS. JetBrains now offers PyCharm as a unified product with free core features and an optional Pro subscription for advanced tools.
PyCharm includes tools for project management, version control, plugins, and debugging all in one place.
What is an IDE?
IDE stands for integrated development environment. It gives developers one application for writing, running, and debugging code, along with tools for managing projects, packages, and environments.
For Python development, that means you can edit files, manage a project, configure an interpreter, install packages, run code, and debug problems from one place.
What is Python?
Python is a cross-platform, open-source programming language used by a wide range of applications and websites. It’s popular because it’s flexible, readable, and useful for everything from automation to web development to data work. Developers can also develop code across multiple operating systems without starting from scratch. A few examples of applications that use Python would be Pinterest and Instagram.
Why should I use an IDE like PyCharm?
Developers can write Python without a full IDE, though it usually takes more effort and gives them less visibility into the project. An IDE like PyCharm brings coding, testing, debugging, version control, and environment management into one workspace.
For businesses and development teams, an IDE can help create a more consistent path from local development to production. PyCharm can help teams standardize how code is written, reviewed, tested, and prepared before it moves into production. That gives organizations more control over the development workflow and helps reduce errors caused by inconsistent local setups or manual processes.
Some of the benefits include:
- Better project organization
- Code completion
- Built-in debugging
- Version control support
- Plugin support
- Easier interpreter and environment management
- More consistent development workflows
- Better visibility before code is pushed to production
Before you install PyCharm on Windows
Before you start the install, check a few basics.
Confirm the system requirements
You need:
- A supported 64-bit version of Windows
- Enough free disk space for the IDE and related files
- Enough memory to run PyCharm comfortably
- Permission to install software on the machine
- A compatible Python version installed
Decide whether you need PyCharm Pro
PyCharm is now a unified product with two access levels:
- Free core features: Good for learning Python, working on standard Python projects, and using essential IDE tools.
- PyCharm Pro: A paid subscription with broader tooling for web development, databases, remote development, and other advanced workflows.
If you are learning Python or building standard Python projects, the free core features are usually enough. If you need advanced tools, PyCharm Pro may be the better fit.
Install Python first
PyCharm doesn’t replace Python. You still need Python on the machine before you can create and run a Python project correctly. If you have questions about whether PyCharm is free or whether it installs Python for you, those are covered in the FAQ section below.
How do I install PyCharm on Windows?
Step 1: download PyCharm from JetBrains
Download PyCharm from the JetBrains website. PyCharm is now offered as a unified product, so you don’t need to choose between separate Community and Professional installers. After installation, you can use the free core features or start with the Pro trial.
Step 2: run the Windows installer
After downloading the .exe installer, open it and choose the installation location. The default location is usually fine for most users.
Step 3: choose the install options
Next, select the install options you want. These may include:
- Creating a desktop shortcut
- Adding the PyCharm launcher to PATH
- Associating file types
- Adding context menu options
Choose the options that fit your workflow.
Step 4: choose the Start menu folder
Choose the Start menu folder location for the PyCharm shortcut.
Step 5: finish the installation
Let the installer complete the process. If the installer prompts you to restart Windows, do that before opening PyCharm. A restart is not always required now, but follow the installer prompt if it appears.
How do I configure PyCharm on Windows?
Step 1: open PyCharm for the first time
When PyCharm launches for the first time, you may be asked to accept terms, choose whether to import settings, and review first-run preferences. The exact screens can vary slightly by version, but the basic flow stays similar.
You may also see featured plugins or optional tools you can add during setup.

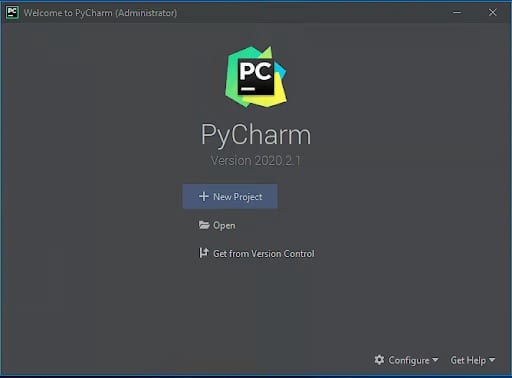
Step 2: review the welcome screen
From the main screen, you can:
- Create a new project
- Open an existing project
- Pull a project from version control
- Access settings and other setup options
Step 3: create a new project
When creating a new project, PyCharm will ask where to save it and which Python interpreter to use. This is where Python needs to be installed and available.
You may also see options for:
- Creating a main Python file
- Using an existing interpreter
- Creating a virtual environment

Step 4: select a Python interpreter
Choose the Python interpreter for the project. If Python is already installed, PyCharm may detect it automatically. If not, you may need to browse to it or install Python first.
If no interpreter is available during project creation, PyCharm may warn you that Python is missing. In that case, install Python first, then return to the project setup and select the correct interpreter.
Step 5: run a simple file to confirm the setup
Create a simple Python file, such as main.py, and run a short test like:
If PyCharm runs the file and shows output, the install and interpreter setup are working.
PyCharm free features vs. PyCharm Pro
| PyCharm free core features | PyCharm Pro | |
| Cost | Free core features | Paid subscription (free for students, OSS contributors, and academics) |
| Best for | Pure Python development, learners, smaller projects | Web development, data science, multi-language and remote workflows |
| Python support | Full | Full |
| Notebooks | Jupyter and Google Colab included | Jupyter, Colab, plus advanced data science tools |
| Web frameworks | Not supported | Django, Flask, FastAPI, and others |
| Frontend languages | Basic JavaScript, HTML, CSS | Full support including React, Angular, Vue, TypeScript |
| Database tools | SQLite only | Full database support (PostgreSQL, MySQL, Oracle, SQL Server, and more via DataGrip) |
| Remote development | Limited | Full support for Docker, SSH, WSL, and remote interpreters |
| AI Assistant | Limited | Included |
PyCharm’s free core features are still a solid option for many Windows users. They work well for learning, scripting, and standard Python development.
PyCharm Pro makes more sense when you need broader tooling, especially for web frameworks, databases, remote development, or other advanced workflows.
A practical way to choose is:
- Choose the free core features for learning, scripting, and standard Python projects.
- Choose PyCharm Pro when your workflow needs the extra features.
Common PyCharm installation problems on Windows
- PyCharm installed, but Python is not detected. This usually means Python is not installed yet or the interpreter has not been selected for the project.
- Python is installed, but the wrong interpreter is selected. Open the project settings and confirm the project is using the correct interpreter.
- PyCharm doesn’t launch after install. Try restarting Windows if the installer requested it. Also check whether the install completed correctly.
- PATH option was skipped. If you skipped the PATH-related install option, PyCharm can still work normally. That option mainly affects command-line convenience.
- You’re seeing Pro trial features you may not need. Unified PyCharm starts with a Pro trial, but you can keep using the free core features after the trial ends if you don’t need the paid tools.
What you can do after installing PyCharm
Once PyCharm is installed and configured, you can use it for more than just editing files.
You can:
- Create and organize projects
- Run and debug Python code
- Manage interpreters and environments
- Use version control
- Install plugins
- Work with project files in one interface
Using PyCharm with a remote development server
PyCharm can also connect to a remote server through SSH for remote development. With this setup, your project runs on the remote server while you use PyCharm from your local machine. JetBrains supports this through the Remote Development option on the PyCharm welcome screen, where users can create a new SSH connection, check the connection, and start the remote IDE backend.
This can be useful when your application needs more server resources than your local machine can provide, when you want development to happen in an environment closer to production, or when your team needs a consistent remote workspace. Liquid Web servers can support that workflow by giving developers a reliable remote environment for building, testing, and deploying Python applications.
PyCharm installation FAQs
Getting started with PyCharm
PyCharm installation on Windows gets easier once you understand the free and Pro access levels and connect the IDE to a working Python interpreter.
Start by downloading the unified PyCharm installer from JetBrains, then confirm Python is installed before you create your first project.
Liquid Web gives developers hosting environments built for real application work, whether you are running Python apps, testing deployments, or scaling beyond local development. Explore managed hosting and dedicated server options built for teams that need reliable infrastructure to match their development workflow.