
Adding WooCommerce to the Genesis Framework is one of the best ways to build a stable and fast running eCommerce site. Due to the nature of the Genesis Framework, it has some quirks though. In this article, I’m going to walk you through the most important steps of the installation and customization process for your new shop.
You’ll see what you get straight out of the box when installing WooCommerce and the Genesis Framework. It comes with a shop with a very basic design and a rock-solid code foundation.
With the strategies outlined in this article, you’ll be able to customize headers and footers on your new WooCommerce installation to match your corporate identity, you’ll know which plugins help you run WooCommerce efficiently with Genesis (and other themes), and you’ll understand how you can integrate WooCommerce into your own child theme based on the Genesis Framework.
Before we start, let me say a word of warning. Do NOT follow along with this tutorial on your live online shop but instead set up a copy of your shop or a brand-new installation. We’ll start from scratch with a shop that doesn’t look good in the beginning and will likely not even match your corporate identity the slightest bit. Doing this tutorial on a shop that’s exposed to live traffic will definitely hurt your sales numbers.
The Installation Process
For demonstration processes, I’ll start the example website for this post with a blank WordPress installation on my local Docker environment. You’ll be able to follow along with any WordPress site that’s updated to the recent version (4.9.8 at the time of writing).
![]() If you do not yet have a website ready, I recommend looking into Nexcess’ plan for Managed WooCommerce Hosting. Once your store grows more popular, you’ll be forever thankful for having a reliable web hosting company and platform.
If you do not yet have a website ready, I recommend looking into Nexcess’ plan for Managed WooCommerce Hosting. Once your store grows more popular, you’ll be forever thankful for having a reliable web hosting company and platform.
Installing the Genesis Framework
The first step in adding WooCommerce to the Genesis Framework is to install both components. You’ll need a license for the Genesis Framework, which you can obtain at the StudioPress website. After you got your license, you’ll receive a login to the download area for the Genesis Framework, which looks like this:
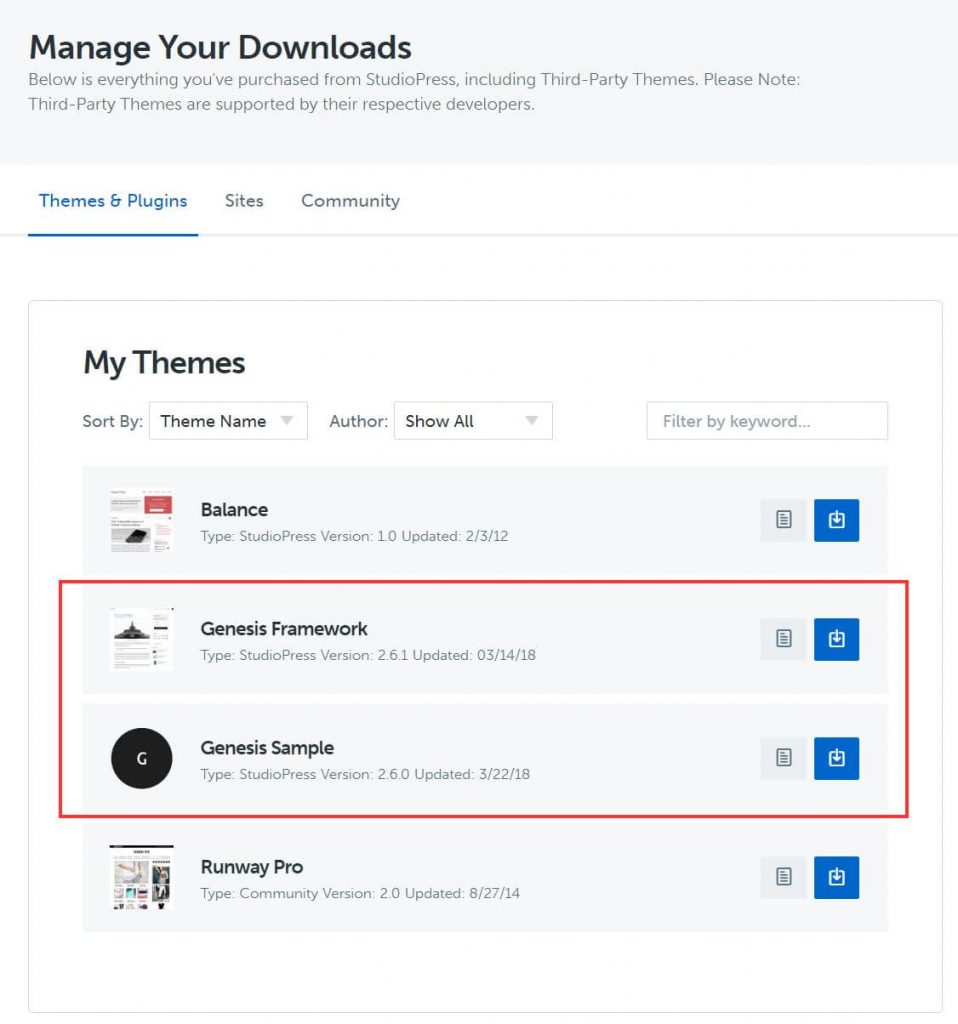
Go ahead and download the two highlighted themes. Depending on the license you bought, you might see more Genesis-based themes in this area. We’ll just need the Genesis Framework itself and the “Genesis Sample” child theme. The Genesis Framework provides the functionality of the theme, whereas the “Genesis Sample” is the child theme we’re going to add WooCommerce to.
After you downloaded those two themes, head over to your WordPress site and install them. Activate the child theme, so that your theme area should look similar to this:
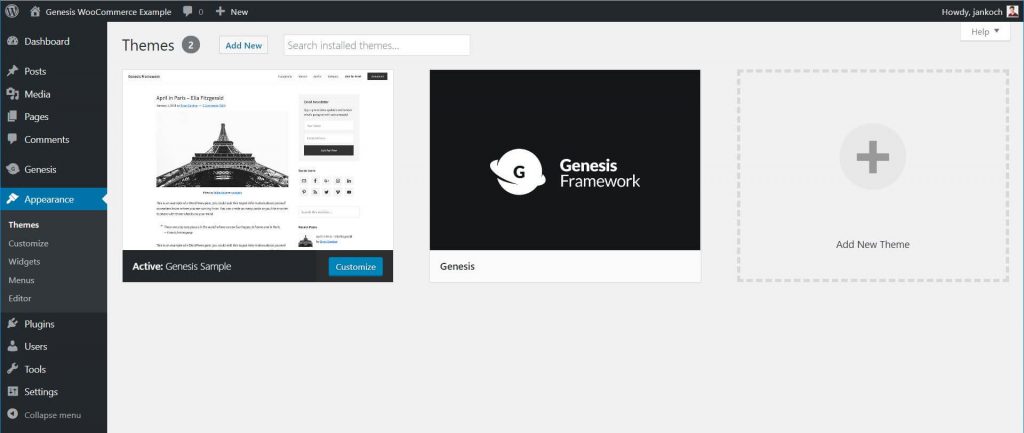
Depending on your setup, you might see other themes installed. In my example website (running on my local Docker environment), I removed all other themes to avoid cluttering up this tutorial. Unsurprisingly, the front end of the website turned into something that isn’t particularly interesting.
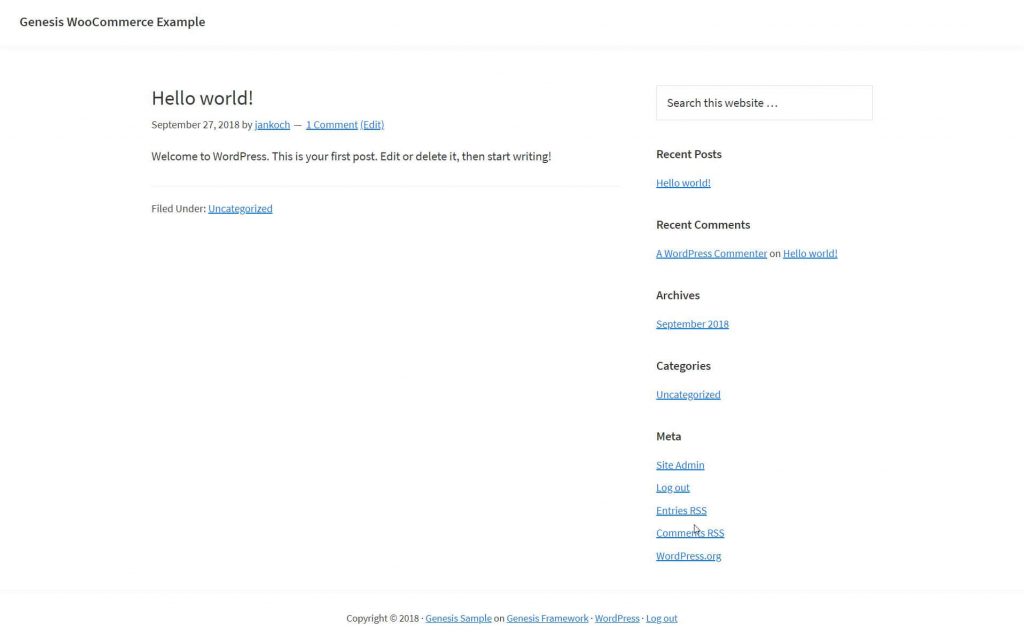
But no worries, we’ll add WooCommerce products to a new, static front-page soon.
Installing WooCommerce
To do that, let’s get WooCommerce installed. You might already have extensions for WooCommerce in mind that you’d like to use, but please don’t jump the gun yet. Let’s first see how WooCommerce and the Genesis Framework play together. Go to the Plugins page in your WP backend and type in “WooCommerce”. You’ll see plenty of plugins coming up, but only install the official WooCommerce plugin for now. We’ll talk about extending the functionality of WooCommerce later in this tutorial.

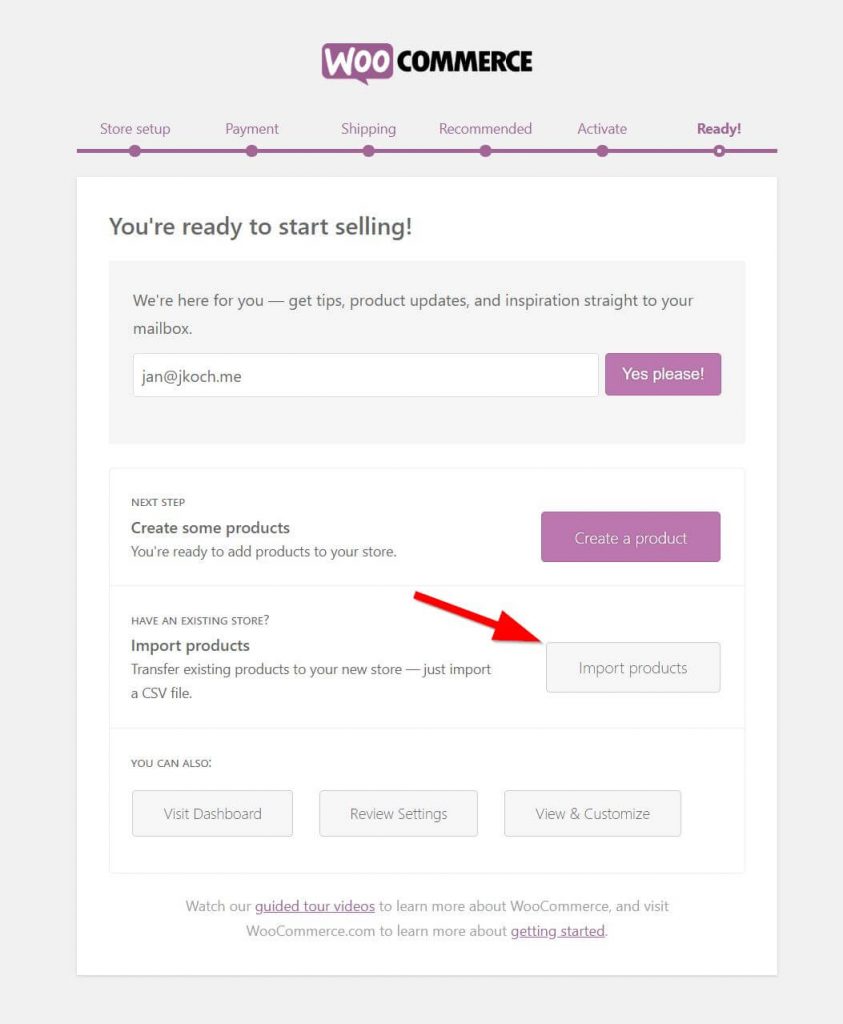
After installing WooCommerce, you can run through their default setup wizard. That wizard will guide you through entering the information necessary to get started with selling your products or services through WooCommerce. You’ll be presented with options for the regular store information like address or currency settings, payment gateways, shipping methods, and costs, and other recommended settings like the Storefront theme (which we don’t use, we use our own Genesis Child Theme), automated taxes via Jetpack (which again, we won’t use) and MailChimp integration (which depends on your choice for your email marketing provider).
By default, WooCommerce offers the following payment options without any other extensions necessary: Direct bank transfer (take payment via BACS), check payments (take payments in person via checks), cash on delivery and PayPal standard. During the checkout process, you can additionally install Klarna, Stripe and PayPal Express Checkout. For the scope of this tutorial, we will also integrate Stripe to be able to accept credit card payments. Covering and comparing all three payment gateways would result in an article for itself.
Adding WooCommerce To The Genesis Child Theme
In order to fully integrate and customize WooCommerce with your Genesis child theme, we’ll need to add some data to the shop. Then you’ll see how products are presented and will be able to follow along customizing the child theme using the popular Genesis hooks, actions, and filters.
Usually, WooCommerce integrates nicely with most themes. The Genesis Framework is a different piece of cake though, as it is heavily relying on its own hooks and filters. While those make up the beautiful layout and customization options, WooCommerce needs to be integrated with those hooks and filters.
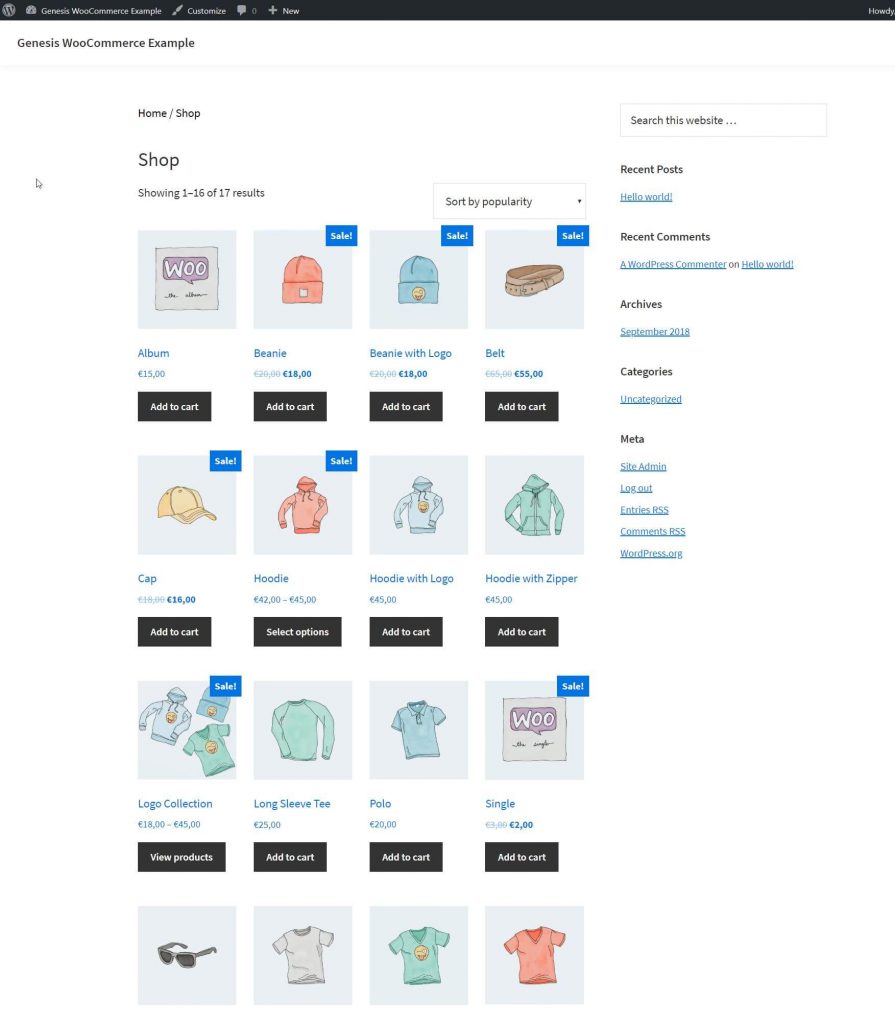
To do that and to check if our integration works, we obviously need some amount of product data. Otherwise, we wouldn’t have products in our shop to perform an optical validation of whether the products are displayed correctly. Fortunately for us, WooCommerce comes with a set of demo products right out of the box. You can use those products in case you don’t want to create your own products just yet. To install those, you can either run the regular WordPress importer or use the WooCommerce setup wizard like I’m doing in the screenshots below:
You can find the CSV file with the demo products in your plugins folder or by downloading WooCommerce again and unzipping the archive. Here’s the official documentation on importing WooCommerce sample data. After going through the import of the sample products, you should end up with 25 products in your shop – more than enough to follow along and to create a nice looking child theme. I’ll outline two solutions for integrating the shop with your theme. The first solution is your best choice if you’re not comfortable editing code files. The second solution is my preferred choice because it gives you more control and clarity about what’s going on. However, it’s more technical and will involve modifying your child theme’s function.php file.
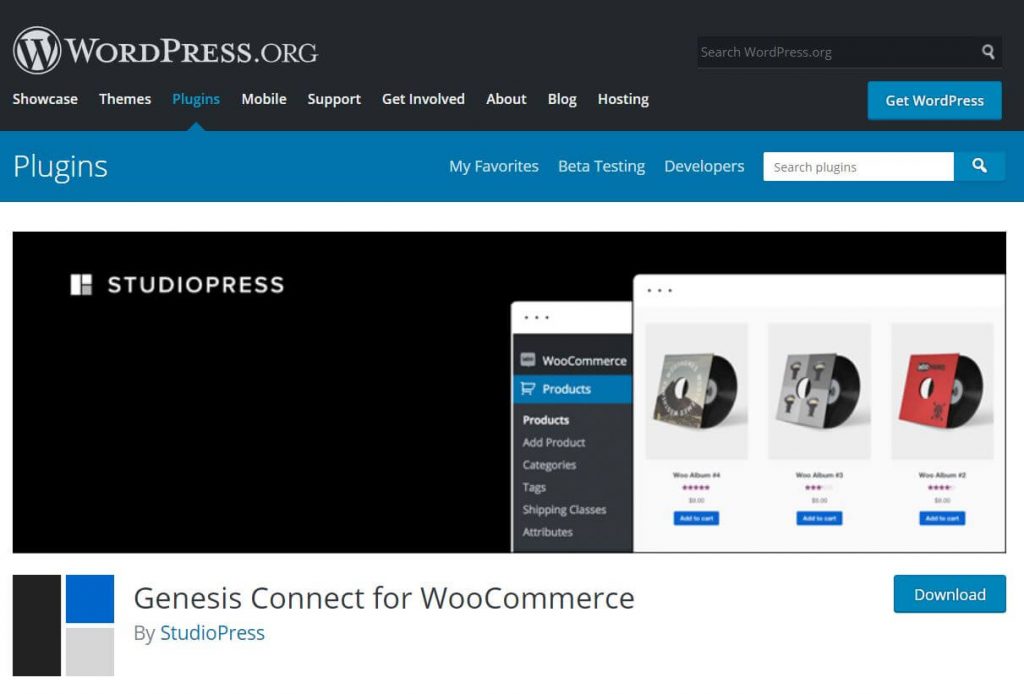
Solution 1: Installing Genesis Connect for WooCommerce
Right after going back to the WordPress admin area after installing WooCommerce, you’ll see a prompt asking you to install a plugin called “Genesis Connect for WooCommerce”. That plugin is needed and quite important for using WooCommerce with Genesis, as the theme framework introduces a number of their own hooks and filters. Out of the box, WooCommerce doesn’t know anything about those Genesis features – so simply copying the WooCommerce template files into the theme folder won’t work as expected. I highly recommend you check out the plugin description to fully understand what’s going on. To quote from the plugin description:
“This plugin replaces WooCommerce’s built-in shop templates with its own Genesis-ready versions, specifically the single-product.php, archive-product.php and taxonomy.php templates needed to display the single product page, the main shop page, and Product Category and Product Tag archive pages.”
You can install the plugin right from the WP Admin area. After downloading and activating the plugin, the layout of the product detail page changes noticeably. Here’s a side-by-side comparison. The left side shows the product detail layout without the Genesis Connect for WooCommerce plugin being active. On the right side, the plugin is installed and activated.
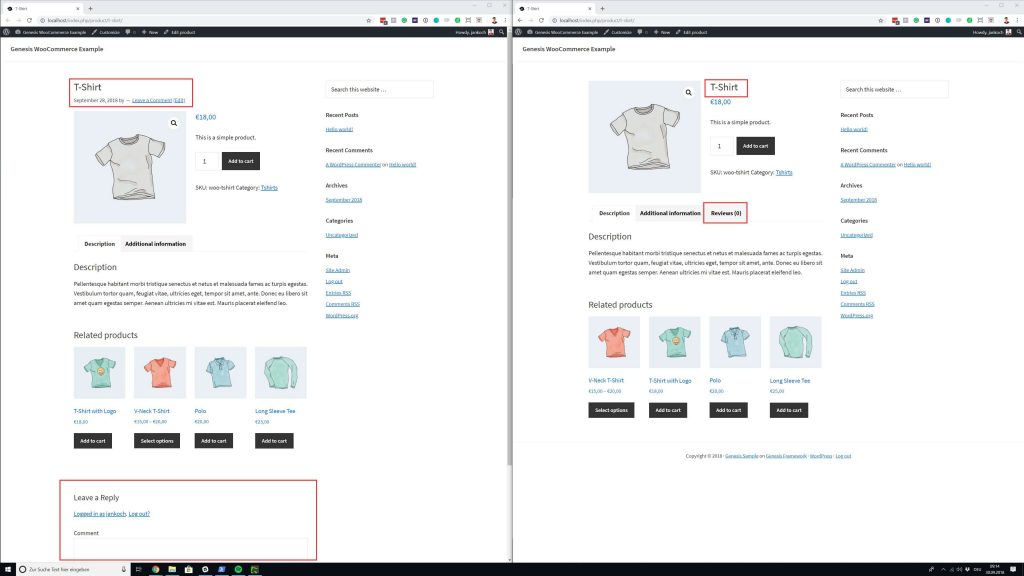
As you can tell from the highlighted areas, four big changes have been made:
- The title is now positioned beside the image instead of on top of it.
- The metadata for publish date and author are gone for good.
- The “Reviews” tab has been missing on the left side, it’s now added (the “Reviews” are activated in WooCommerce settings).
- The comments section is gone.
To further customize the WooCommerce templates (requires coding skills), you could follow the official WooCommerce documentation:
“Edit files in an upgrade-safe way using overrides. Copy the template into a directory within your theme named /Woocommerce keeping the same file structure but removing the /templates/ subdirectory.”
You’ll also want to declare theme support for WooCommerce in your theme’s functions.php file by using the “add_theme_support” function. Check this Github wiki entry for more details. Be aware though that this step will change the layout of the product’s detail page again:
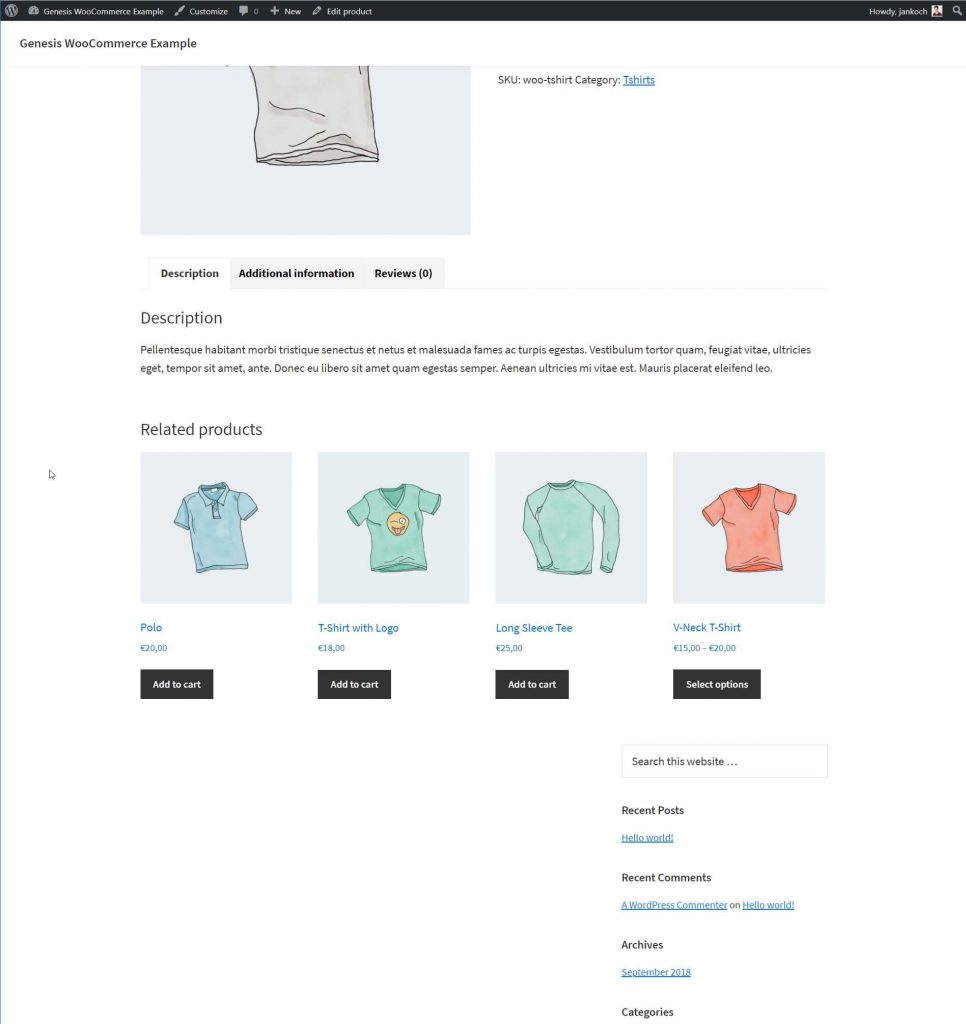
You can tell that the sidebar is moved below the product and the
As long as you don’t plan on coding your own WooCommerce template files or just want to use custom template files for emails and other non-frontend-related layouts, you should be fine with using the Genesis Connect for WooCommerce plugin. However, as soon as you want to customize the WooCommerce templates, you might want to look into solution 2 for integrating WooCommerce with the Genesis Framework.
Solution 2: The AlphaBlossom Method
I first came across this method on Tony Eppright on his AlphaBlossom blog. He outlines a method that removes certain WooCommerce actions for building the markup of WooCommerce pages and that replaces those actions with Genesis-based markup. I much prefer this approach to using the above-mentioned plugin, because it gives much more clarity about what’s going on.
You’ll want to be comfortable editing your theme’s function.php file to follow along. If you’re not, you can easily break the child theme and your site.
These are the code snippets that go into your functions.php file:
https://gist.github.com/AlphaBlossom/c11192a0132d494c3448#file-woocommerce-genesis-theme-support-php
If you want to keep the WooCommerce breadcrumbs instead of using Genesis breadcrumbs, you’ll want to add this code snippet:
https://gist.github.com/AlphaBlossom/c11192a0132d494c3448#file-replace-genesis-breadcrumbs-woocommerce-php
If you want to use the Genesis breadcrumbs instead of the WooCommerce breadcrumbs instead, use this code snippet:
https://gist.github.com/AlphaBlossom/c11192a0132d494c3448#file-replace-woocommerce-breadcrumbs-genesis-php
And finally, add the theme support to your functions.php file:
https://gist.github.com/AlphaBlossom/c11192a0132d494c3448#file-remove-woocommerce-admin-theme-support-warning-php
The beauty of Tony’s approach is that he leaves Genesis hooks in place. So if other plugins rely on those, they’ll still work as expected on the WooCommerce pages. And – other than the plugin above – the code will work with customized WooCommerce template files. In this tutorial, I’ve copied all WooCommerce templates to the Genesis Sample theme folder, so that the child theme is loading them. While the plugin broke the layout and moved the sidebar below the product content (as shown above), the next screenshot shows that Tony’s code is not doing any of that:
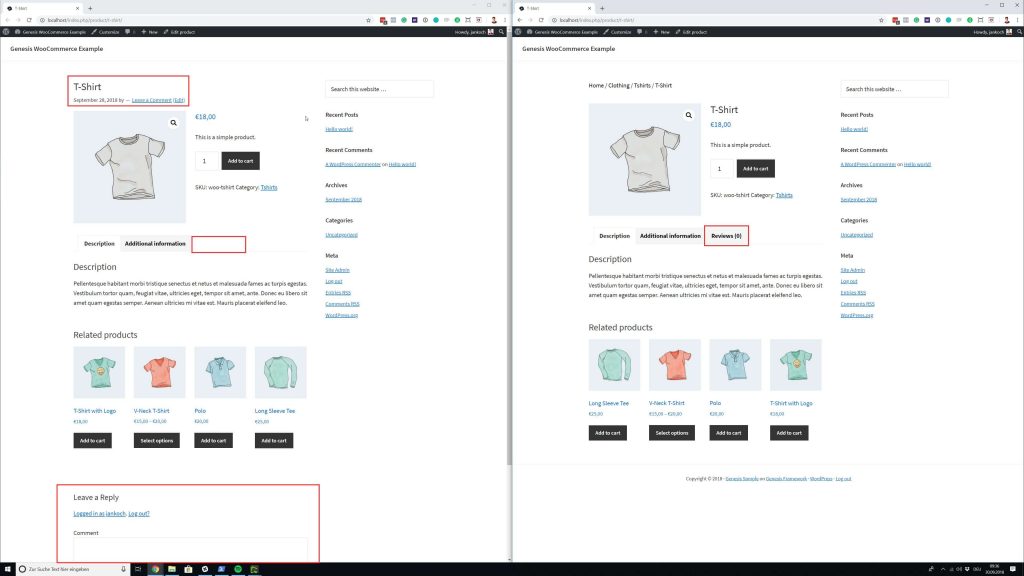
We see that the same four changes have been applied, but that the overall layout still works beautifully. The same is true if you were to check the Shop page.
Everything looks as expected and now you’re ready to further customize your Genesis-based child theme. Changing it’s name from “Genesis Sample” to your brand’s name or the client’s brand name probably is a good idea.
Ready to Upgrade Your Site to Managed?
We’ve built a high-performance platform dedicated to eCommerce stores of every size, giving you the fast store you need to convert more visitors and leads into revenue. Try Managed WooCommerce Hosting today and see the difference.

