Getting Started with Solid Central
Introduction to Solid Central
Solid Central is a service where you can manage multiple WordPress websites, access the admin areas of those websites, and perform critical maintenance, security, backups, and monitoring all without leaving Solid Central. It�s a� Central location for Managing WordPress sites. It�s perfect for small and large agencies and freelancers managing WordPress websites for themselves and clients.
This document will walk you through getting started with Solid Central, the basics of the interface, and guide you on some best practices to get the most out of the service. Instead of describing settings and interfaces, the document lines out a path to get you up and running with Solid Central as quickly as possible. Where necessary, follow links to other more in-depth docs discussing various settings and options.
Need further help? The SolidWP Support team is staffed with WordPress and web experts, and they are ready to answer your questions. Reach out via the support channels.
A Brief technical explanation and word of caution
Solid Central connects to your WordPress website via a connector plugin. In order to be able to perform many of the actions it does, that plugin grants itself (and therefore the Central application�s servers) full administrator rights to the site. Anything an admin user can do, on a technical level the Central servers are able to do, though there�s no user interface to do many things that could compromise your sites.
The Solid Central engineers and infrastructure do not take that responsibility lightly, and have best-in-class security to prevent breaches, but by far the easiest route for a bad actor to gain access to your sites would be to compromise your Solid Central account. Treat your Central login credentials with the utmost security.
Connecting to your WordPress Site
Many of the tasks that you�ll want to initiate related to Solid Central are accessible from both the WordPress side as well as the Central side. That list of tasks includes the most basic operation: connecting to your WordPress site. There�s no difference in the outcome for which option you choose: your site will populate in the list on your Central dashboard giving you access to all of Solid Central�s functionality.
If you�ve not already connected a site, the first screen greeting you will be one prompting you to connect with either method. For a seamless experience, connect from within Central.

Connecting From Within Central
If you�ve already connected to a site, the + Add Site button above the Site Names in the upper right corner of the Sites screen will give you the same options.
Select the Connect Site From Solid Central option in the pop-up menu.
Then, enter your site address.
At this point, you are redirected to the site itself to add an Application Password to enable Solid Central to connect to the site. Learn more about Application Passwords.
Once you�ve entered the username and password and connected to the site, what happens �behind the scenes� (with some notices that you�ll see in real-time) is that Solid Central installs a plugin on your site, activates it, and establishes the connection with Central�s servers. Click through, the page will refresh and show you your site information. (You can skip down in this documentation to the section on �Securing Your Solid Central Account.�)
Adding a site with Solid Security Pro installed and Active
Solid Security Pro is SolidWP�s flagship security product, and Solid Central checks for it on the site before attempting to connect. This enables you to securely connect to the site even if you have 2-Factor Authentication enabled on your site. Once it�s connected, Solid Central won�t need to repeatedly connect so you�ll just have to verify the 2FA step this one time.
After entering the site’s URL, Solid Central recognizes that Solid Security Pro is installed, and routes you through an additional step before redirecting you back to the Solid Central dashboard.
That�s it! Your site is now connected. You can skip the next section of this document.
Connecting Manually (from the WordPress site)
If you�d prefer to connect without entering administrator credentials to your site you can manually connect. To manually connect a site, you�ll need to download and install the Solid Central connector plugin on your site, and then connect it to Solid Central by inputting your solid central credentials into WordPress.
First, add the Solid Central plugin. Search for it in the WordPress Plugin Directory, and install and activate it. Once it�s active, navigate to Settings > Solid Central and you�ll be prompted to enter your SolidWP credentials. Important: these are the credentials used to log into central.solidwp.com, and NOT your WordPress site credentials.
Once connected manually, the notice will display telling you how many sites are left available for your Central account.
That�s it! Your site is now connected. Now for all that you can do within Solid Central.
Securing Your Solid Central Account
Before digging into Solid Central�s features, it�s imperative that you secure the account so that only you have access, and that you have a way to verify your access to the account. SolidWP security technicians and engineers take very seriously the level of access Solid Central has to your site and server, and if you lose access it is intentionally cumbersome to regain that access.
The very best method of securing your account is using Two-factor Authentication (2FA). To enable 2FA on your account, navigate to your account settings by selecting the dropdown menu at the very top right of any Central screen, and selecting �Settings� from the list.

On that screen, select the �Two-Factor� tab, and Enable 2FA by following the instructions. Note that in previous versions there was a way to use SMS for 2FA, but that has been removed for new users. Recent security best practices preclude the use of SMS as it is vulnerable to spoofing attacks and not as secure as App-based 2FA.
Note: during the setup procedure for 2FA you are given backup codes to use in the event that you lose access to the second factor for authentication. These codes should be treated with the utmost care, and saved into some system that is not dependent on having your secondary factor device in order to access. The process for recovering an account without those codes is intentionally difficult to the point of impossible in some cases. By enabling 2FA, consider yourself to be politely asking the SolidWP application to never give out account access to anyone without the code, even people who claim to have lost the code.
Utilizing Solid Central
The remainder of this document gives you a high-level overview of the power of Solid Central for managing your WordPress websites. Each screen is accessible from the Left-side menu that’s visible on any logged-in screen. At first view, most of the screens deal with all connected sites, though some (most notably the Sites screen) give you the ability to handle individual sites.
Sites Screen
The sites screen both gives a high level overview and serves as a portal into the real power center of Solid Central: managing and controlling individual sites. Before you select a specific site, the overview displays a list of all sites connected to Solid Central, but first (and prominently) gives you an immediate view into what needs your attention in terms of Updates. Each link in the top section allows you to drill down into the Updates page. Additionally, the full list of sites is searchable to find the specific site you need to manage.
Tags and Filtering
A power feature of the Sites screen is tagging. By default when you load the Sites screen, you see all sites connected to the Central account in the list. That’s handy until you get a list of sites that’s too long to skim, making it difficult to quickly access the site you’re looking for. Enter the concept of tagging. With tags, you can categorize your sites by whatever metric you like.
For example, if you sell your clients various maintenance packages like quarterly, monthly, and weekly, you can create tags for each. Then when you visit the Sites screen and you need to track down only the sites that are signed up for weekly site maintenance, the “filter” option makes that a two-click reality.
Tags give you the ability to instantly filter by any metric you want. Here’s a short and incomplete list of potential tags:
- business type (nonprofit, corporation, solopreneur, school, etc)
- whether e-commerce is involved
- location
- number of team members
- amount of revenue generated
- whether the organization is woman-owned
- anything!
Tags are stackable in the filters as well, so it’s one quick extra selection and you can select all sites that have the tag weekly-maintenance and oklahoma.
Managing individual sites
Once you’ve used filters, tags, or scrolling the list to find the site you’d like to manage, the site title is linked to a screen that gives you multiple ways to manage the site.
The individual site screen has various tabs and features, covered more deeply in the Managing Individual Sites documentation.
Hide and Show Solid Central plugin in the WordPress Dashboard
You can hide the Solid Central plugin in the site’s WordPress dashboard by clicking the cogwheel to the right of the Site Name and selecting Hide Central Plugin.
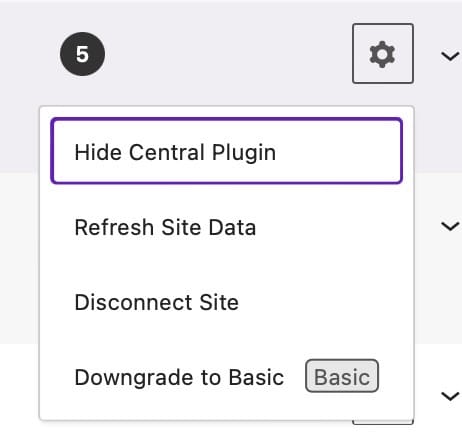
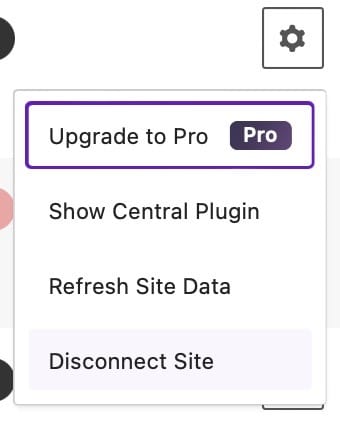
To show Solid Central in the WordPress dashboard, click the cogwheel, and select Show Central Plugin.
You can also Force Show Central by using this URL in your WordPress dashboard. yoursite.com/wp-admin/plugins.php?ithemes-sync-force-display=1
Updates Screen
The Updates screen allows a high-level view of all connected sites with the special context of “things that need updating.” At the top of the page is how many sites need a WordPress update, followed by a list of individual plugins and themes in need of update and how many affected sites each is installed on.
The filtering option on the updates screen allows you to view all software in need of updates, or filter by type (themes or plugins).
The list view allows you to select all plugins and update quickly, or to select only the plugins you want to update. This type of flexibility allows you to react quickly to security-related updates. If you have one plugin installed on all of your sites and get alerted to an update needed, you can update all of the sites (and just that one plugin on each) in just a few steps. Select that plugin and choose the “update” option.

Install Screen
True to its name, Solid Central allows you to do many operations that historically would have required duplicate work on individual sites to be handled all centrally from your Solid Central dashboard. The Install screen is a great example. Suppose you find out about a great new plugin that handles caching in a smart and Supports ZIPs, directly from your SolidWP account, and from the WordPress Plugin Directory
Uptime Screen
Add sites to Uptime monitoring, and see all sites and the last time they were down, along with averages and history.
The Uptime feature in Solid Central uses the UptimeRobot tool to regularly ping your sites and ensure they’re online. By default, UptimeRobot checks your site’s status every five minutes.
Reports Screen
Configure reports to drill down into the exact data you want to see for each site.
Timeline
Live-updating timeline of things that Central is doing on all of your connected sites
Licensing
Since SolidWP has an entire suite of products and they each require being licensed on individual sites, the Licensing screen of Solid Central is a one-stop option to add or remove licenses to individual sites.