Conversion Settings
In the Conversion Settings area, you can configure general parameters for your Conversion including whether you are using a popup, slide-in, or banner. You’ll also have the option to enable Kadence Conversions Analytics Tracking with a simple toggle.
Getting Started
To get started, select the Conversion Block and open the Block Settings. Here, you’ll find the Conversion Settings section. Expand this area to configure your Conversion Type and Conversion Goal settings.

Conversion Type
Select the type of Conversion to use. Available options include:
- Popup – Covers the entire screen with popup content, drawing focused attention.
- Slide In – Slides onto the screen, displaying content without covering the entire screen.
- Banner – Displays as a banner across the website, typically at the top or bottom.
Analytics Tracking
This option allows you to track your conversions including Total Views, Total Conversions, and Conversion Rate. You can access your analytics data by navigating to Conversions → Dashboard.
Conversion Goal
To set up your Conversion Goal, decide whether to measure a successful conversion by form submission or button click. Once a Conversion Goal is achieved, Analytics Tracking, if enabled, will record the action. If the Close Conversion on Goal Event option is enabled, the Conversion will automatically close upon completion.
Form Submission: This option is ideal when using a contact or signup form. Once a form within a Conversion is submitted, it will trigger the Conversion Goal.

Button Click: This option allows a button click to trigger the Conversion Goal.
Close Conversion on Goal Event: Enable this option to automatically close the Conversion when the Goal Event is triggered.

Submit Form Conversion Goal
The Conversion can contain a form, including but not limited to Kadence Forms (Adv). You can also add most other forms including third-party forms or mailing list signup forms. The Conversion will listen for a form submit to trigger the conversion goal and closing of the conversion (if enabled).
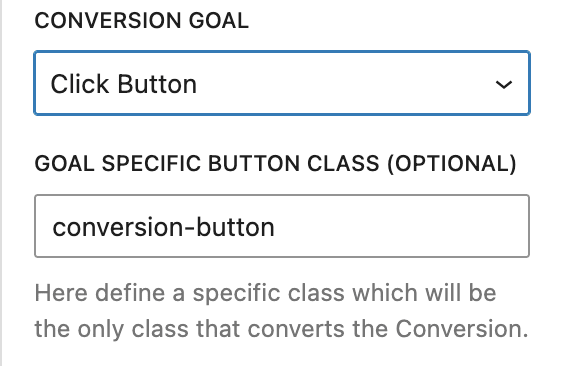
Click Button Conversion Goal
When using the Click Button Conversion Goal the Goal Specific Button Class field will be revealed.
Goal-Specific Button Class: Allows you to assign a unique button class to track a specific conversion goal. This ensures that the correct Conversion Button is clicked to trigger the goal accurately.
For example, if you have two buttons, such as Yes and No, you can add the Goal-Specific Button Class to the Yes button to track the conversion goal.
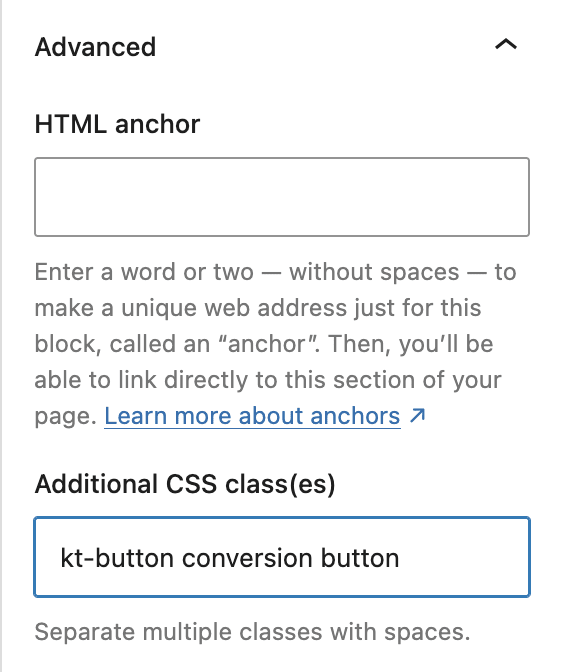
Button Configuration — When using an Advanced Button, you can add the Goal-Specific Class by navigating to Block settings → Advanced tab → Advanced section and adding the class to the Additional CSS class(es) field.
For other button blocks such at the WordPress Button block, navigate to the Advanced section and add your class there.

Custom Conversion Goal
You can use another element such as an Image Adv block as your Conversion Goal. To do so, set the Conversion Goal to Click Button, add an image to your Conversion, and add the Goal Specific Button Class to the image. Since the Conversion Goal script will be looking for a button, you’ll also need to add the kt-button class to the image. You can link the image to another page or you can enable Close Conversion on Goal Event. When the image is clicked, the Conversion Goal will be triggered.