
How to use the WooCommerce checkout block

To use the Checkout block for WooCommerce, check out this article. Ever since the introduction of blocks with WordPress 5.0, more platform functionality has been replaced by the easy-to-use blocks.
Get fast, reliable hosting for WordPress
Power your site with the industry’s fastest, most optimized WordPress hosting
Using WooCommerce checkout block
Ever since the introduction of blocks with WordPress 5.0 more and more functionality has been replaced by the easier to use & visually appealing blocks. If you want to use the new Checkout block for WooCommerce follow these instructions.
Requirements:
WordPress 5.3+ and WooCommerce 4.0+
Any of the following payment methods: Stripe Payment Request (ApplePay, ChromePay), Stripe CC payment method, PayPal Standard, or Cheque.
You can’t use the Classic Editor plugin
Note: eventually this functionality will be merged into WooCommerce core and you won’t need the WooCommerce Blocks plugin.
Replace checkout shortcode
We have to start by replacing the existing checkout shortcode.
In your WordPress admin navigate to Pages > Checkout
You should see the existing shortcode

Delete this shortcode
Add the new Checkout block

When you’re done you should see a preview of the checkout.
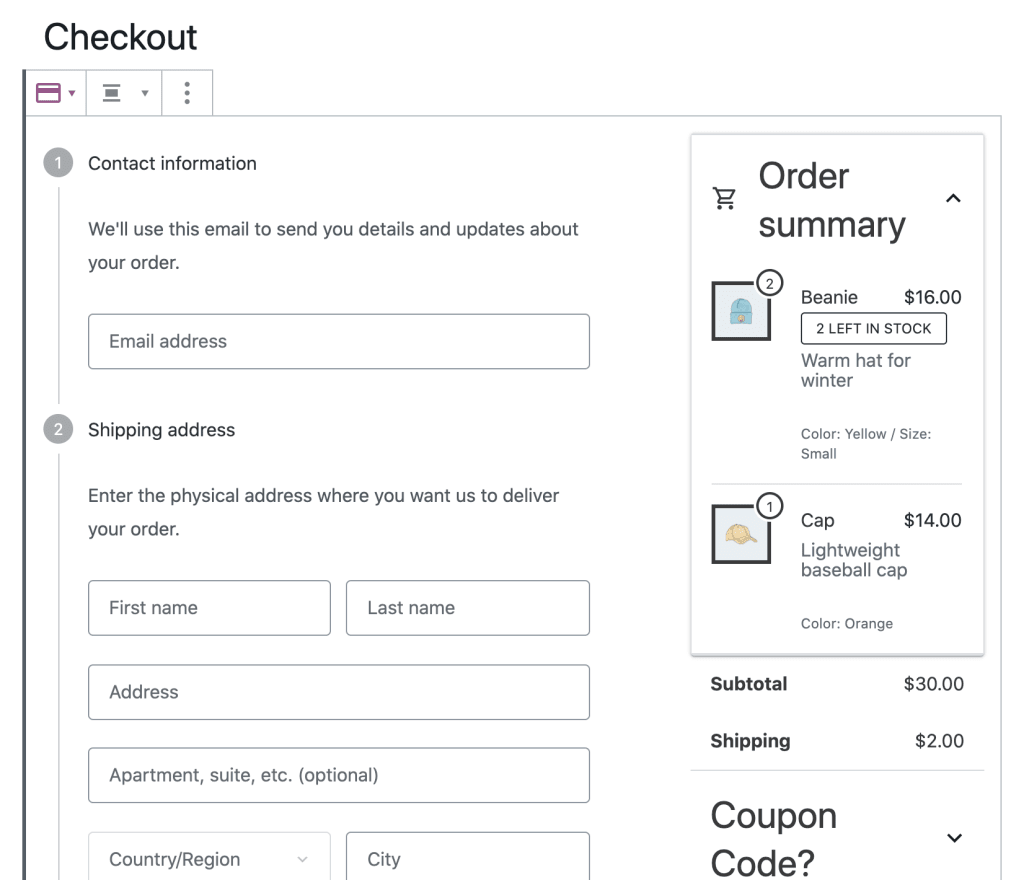
This preview gives you a visual representation of the checkout. Your theme any plugins can still modify this checkout and they won’t necessarily affect this preview. You should use this preview as a guide to what the checkout looks like.
Customize checkout settings
With the checkout block it’s very easy to customize the checkout. You can do so with the built-in options as opposed to needing a plugin.
You can optionally display these fields:
Company
Apartment
Phone (which you can also require)
You can also configure navigation options:
Add links to policies (Privacy & Terms and Conditions)
Return to cart link
You have to configure the privacy and terms & conditions pages separately.

Once you’re done configuring the checkout make sure to save the page.
Additional resources
Google shopping & WooCommerce: listing products →
Discover WooCommerce Google shopping tips to reach more shoppers.
Enabling and scheduling a coupon code →
Learn how to schedule WooCommerce coupon codes for timed promotions.
WooCommerce: automatically apply coupons in cart →
Explore WooCommerce coupon automation tips for easier promotions.