How to enable Varnish for Magento 2 on Nexcess Cloud
Prerequisites
Your Client Portal login credentials. If you cannot locate them, click Forgot Password? on the login page.
An existing Nexcess Cloud Magento 2 account. See How to create Nexcess Cloud accounts for more information.
Login credentials and admin access to your Magento 2 store.
Step by step instructions
Log in to sites-portal.liquidweb.com.
From the home page, click Plans.
From the home page, click your desired Magento cloud service.
Select Menu > Containers.
In the Varnish section on the Containers page, click Enable.
Choose your plan, then click Enable.
Allow a few moments for setup to complete, then note the hostname and port information.
Log in to your Magento 2 admin panel. To do this from your Client Portal, select Menu > Environment, then click App Admin.
Select Stores < Configuration.
Scroll down and select Advanced > System.
Select Full Page Cache. In Caching Application, clear the Use system value check box, then select Varnish Cache (Recommended).
Under Varnish Configuration, in the Backend host field, enter the hostname you were provided from Step 7. In the Backend port field, enter the number for “Main Port”.
Click Save Config.
php bin/magento setup:config:set --http-cache-hosts=ENDPOINT:PORTUsing the information from Step 2F as an example, the command would be:
php bin/magento setup:config:set --http-cache-hosts=us-midwest-1.nxcli.net:1383Verify full-page caching is enabled
- From the command line, enter:
php bin/magento cache:statusIf you see a 0 next to full_page, as below: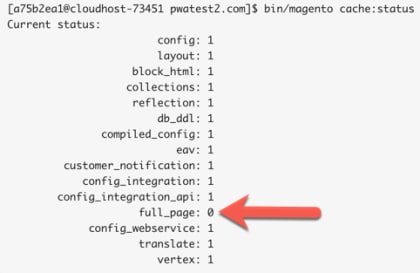
Then, enter:
php bin/magento cache:enable full_pagePurge the cache in the portal
If you need to purge the Varnish page cache for your site you can do so in the performance menu tab of the portal. Click on the Purge Cache button which will clear the NGNIX micro-cache and the Varnish page cache.