Flex Plan & Magento Email Configuration/Filters
Prerequisites
- Your sites-portal.liquidweb.com login credentials. Click the Forgot Password? link on the login page if you cannot locate them.
- An existing Nexcess Cloud Account using a Magento Hosting Plan or a Flexible Cloud Hosting Plan. See How to create Nexcess Cloud accounts for more information.
- Your email account must already have the local mail delivery option enabled. If you need to enable local mail delivery for your domain’s email account, refer to How to configure a remote mail server.
Getting Started with Flexible Cloud & Magento 2 Setup
With Magento and Flexible Cloud Plans, you can access the SpamAssassin feature and additional Flexible Cloud Plan or Magento email configuration options within the Nexcess SiteWorx Cloud Control Panel.
Let’s assume you have purchased a Magento or Flexible Cloud Plan with Nexcess, and you need to set up a Magento email. Magento’s email setup is simple. Just follow the guidance below.
- Log into the Control Panel through sites-portal.liquidweb.com.
Sections in the Control Panel
Managing Domain Section
The managing domain is what you will be setting up your email for. Since Magento and Flexible Cloud Plans support multiple domains, you might want to set up email for each domain. You must choose the right domain that you will be working with.
These will be listed as CNAME targets which can be found within the Nexcess Client Portal for each domain.
Email Section within Hosting Features
The Email Section shows a summary view of all the mailboxes on your plan and any aliases or groups you have created. This section enables you to create autoresponders for emails and contains a link to Webmail.
Mail Options Section within Administration
The Mail Options section empowers you to:
- Enable or disable local mail delivery (remote setup).
- Create global mail filters.
- Manage spam settings (SpamAssassin Configuration in the Nexcess Cloud).
Magento Email Setup
Once you have selected the correct domain you will be managing, click Hosting features > Email > Mailboxes.
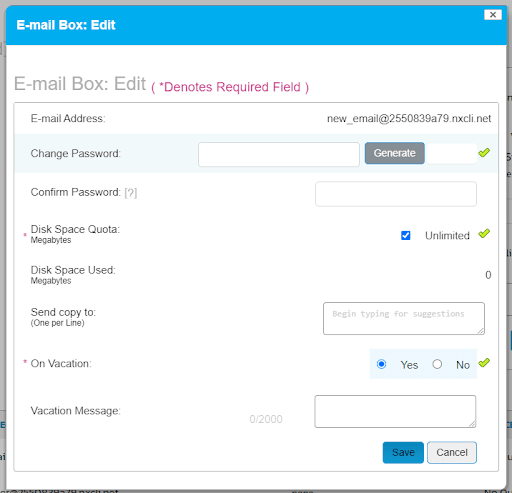
Then, the first thing you will see is a form to set up a new email address. You will need to enter the new email user (part of the email address before the @ symbol). You can enter a new password for it or have a secure password generated by clicking the Generate button.
Depending on your plan and preferences, you can set the disk space quota for this email or leave it unlimited.
The Send copy to field is where you can enter any email addresses you want this email address to forward to.
Once you have clicked the Add button, the new mailbox will be created and appear in the list of Existing Email Boxes.
You can also edit your password or forwarding email addresses using the Edit button.
Magento Email Configuration
Let’s say you have noticed increased spam emails in your Magento email inbox.
To combat the spam you are seeing, you can manage SpamAssassin’s thresholds in the Mail options > Spam settings section:
- SpamAssassin Status — This shows SpamAssassin’s status and enables you to start, stop, and restart the service.
- Spam Delivery — This shows what happens to spam once SpamAssassin tags it. You will have two options:
a. Send the spam to the Spam mail folder.
b. Delete spam that scores higher than a certain threshold and send other spam to the IMAP mail account called Spam.
- Spam Score Threshold — SpamAssassin tags and identifies messages that score above this value. Messages with lower scores will not be tagged as spam.
- Rewrite Message Subject — SpamAssassin can change the subject line of messages it flags as spam, making them more visible when viewing a list of messages. SpamAssassin can also filter messages based on some email clients’ subject lines.
- Message Attachment Policy — Control how SpamAssassin modifies the messages it tags as spam.
- Global Default Spam Preferences — Your server admin can configure server-wide SpamAssassin preferences. The options you define will override any specified global preferences.
- Advanced SpamAssassin Custom — Create custom filters for your Magento email. For example, if you wanted to whitelist emails from a specific domain, this is where you would do it:
The Filters section empowers you to filter out emails coming from a particular sender (both email or domain) or containing a particular string within the subject:
These emails will be blocked from even reaching your mailboxes.