How to enable SSH access
If you are a Nexcess Cloud client, SSH access is enabled by default. See How to generate and view SSH/FTP passwords for your Nexcess Cloud account for more information.
Method
This procedure alone will not grant SSH access; you must also whitelist any IP addresses that will connect using SSH. See How to manage firewall whitelists in SiteWorx for more information.
- Log in to your SiteWorx account.
- If you do not know your password, click Forgot your password on the login page. For more information, see Logging into Siteworx.
- From the main menu, click Hosting Features > SSH Account.
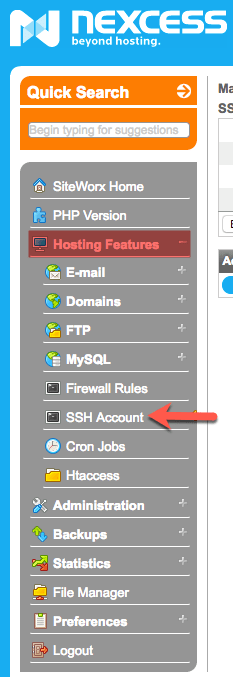
- In the SSH Account Information section, click Enable account.

- When complete, SiteWorx will show your new SSH password. You may reset this password at any time by clicking Reset password.

- You must now whitelist any IP addresses that will log in using SSH. Follow the instructions in How to manage firewall whitelists in SiteWorx. In Step 4 of that document, when you select a Port:
- If your SSH username resembles an email address, select SFTP [24].
- Otherwise, select SSH [22].
Resetting SSH passwords
If you are a Nexcess Cloud client, see: How to generate and view SSH/FTP passwords for your Nexcess Cloud Account and How to add SSH keys for your Nexcess Cloud account.
- Log in to your SiteWorx account.
- If you do not know your password, click Forgot your password on the login page. For more information, see Logging into Siteworx.
- From the SiteWorx main menu, click Hosting Features > SSH Account.
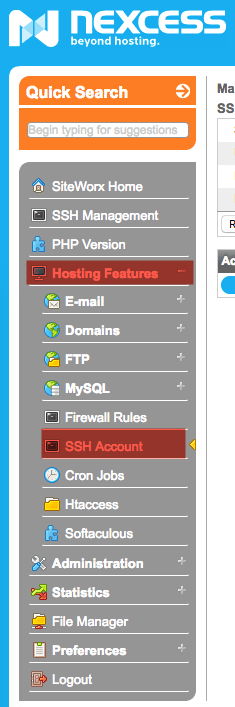
- In the SSH Account Information section, click Reset password.
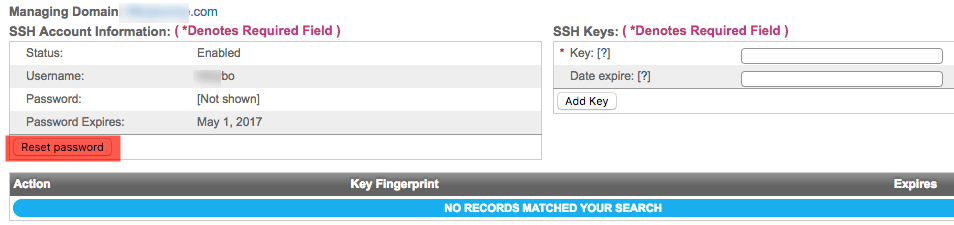
- After a moment, SiteWorx will provide the new password.

Adding SSH Keys
For more information about SSH keys and how their use can simplify control access for multiple users, see What are the advantages of using SSH keys to control access for multiple users?
- Log in to your SiteWorx account.
- If you do not know your password, click Forgot your password on the login page. For more information, see Logging into Siteworx.
- From the SiteWorx main menu, click Hosting Features > SSH Account.

ATTENTION: For Step 3, you must have already created the SSH key pair using the method provided in How to create SSH keys in macOS and Linux or How to create SSH Keys in Windows with Putty. You will use the public key for Step 3.
If your key is valid, SiteWorx will confirm success.
In the SSH Keys section, paste your public SSH key into the Key field and, if desired, fill the Date expire field. Click Add Key.