
◦ Comprehensive security
◦ 24/7 support
WordPress Guide → Build → Cloudinary + WordPress
How to optimize your WordPress media library with Cloudinary

So, people often categorize Cloudinary as a Content Delivery Network (CDN), but is that the best description of this platform?
Let’s take a deep dive to reveal how a Cloudinary + WordPress setup can provide a powerful and speedy web presence.
What is Cloudinary?
Cloudinary is a cloud-based image and video management platform that provides the following features:
Automatic format and quality selection deliver images in the best format and compression for the user’s device, improving load times without manual optimization.
Video transformations let you programmatically modify videos on the fly using transformation URLs or SDKs. This enables resizing, cropping, layering, trimming, and effects without manual editing tools or re-encoding.
The Transformation URL API allows real-time image and video resizing, cropping, and styling via URL parameters, enabling dynamic asset delivery without re-uploading.
The digital asset management dashboard provides a centralized interface to organize, tag, and search media assets, simplifying content workflows and reuse across projects.
Intelligent responsive breakpoints mean automatically generated image variants for different screen sizes, which helps developers build responsive websites more efficiently.
How to integrate Cloudinary and WordPress
Cloudinary will automatically sync images that exist in your site’s WordPres media library along with new images being uploaded on your site to your WordPress account on Cloudinary. Before it can do that, though, you’ll need to lay some groundwork.
Step 1: Setup the plugin
To be able to use Cloudinary / WordPress solution your site, you will need to install and activate the Cloudinary WordPress plugin on your site and sign up for a Cloudinary account:
To access it from your admin dashboard, go to Cloudinary > Setup.

Click Next to connect your Cloudinary account if you already have one, and skip to step 3. If not, click Signup to create it.
Step 2: Verify your Cloudinary account
If you don’t already have an account, you can go to Cloudinary.com and sign up for a (free) account. You can create one using your email, Google, or GitHub account.

After signing up for a Cloudinary account, you’ll need to check your email address to verify it.
Step 3: Connect to the API
From your Cloudinary account, go to the API Keys page and copy the values in the API Key and API Secret columns.
Go back to WordPress, open the Cloudinary plugin dashboard, then click on Next to go to the Connect Plugin screen. Paste these values into the Connection string field in the format specified by the placeholder label.

Click Next when you’re done to go to the Recommended Settings screen.

Toggle the options on or off as you see fit, then click Next to complete the initial setup process.

Step 4: Adjust your image settings
After your Cloudinary + WordPress setup is done, the existing images in the media library will be uploaded and synced to your account automatically.
Cloudinary will handle several of your default settings, including general, image, video, and gallery settings, as well as lazy loading and responsive images. You can always tweak these later.
In the plugin’s image settings section, you can set which image format and quality should be served to site visitors. Both will be set to auto by default, and that should be enough to improve speeds on most websites.

The default settings for lazy loading will set a pixel threshold past which lazy loading should be enabled. Preloading animation should be enabled by default, and you can set the color that should be used for it. You can customize the placeholder with blurring, pixelation, and a dominant color.
These are, of course, the basics of working with images. We’re going to cover more advanced transformation techniques in step 6.
Step 5: Adjust the gallery settings
If your site uses WooCommerce, you can replace the default gallery with the Cloudinary product gallery on product pages.
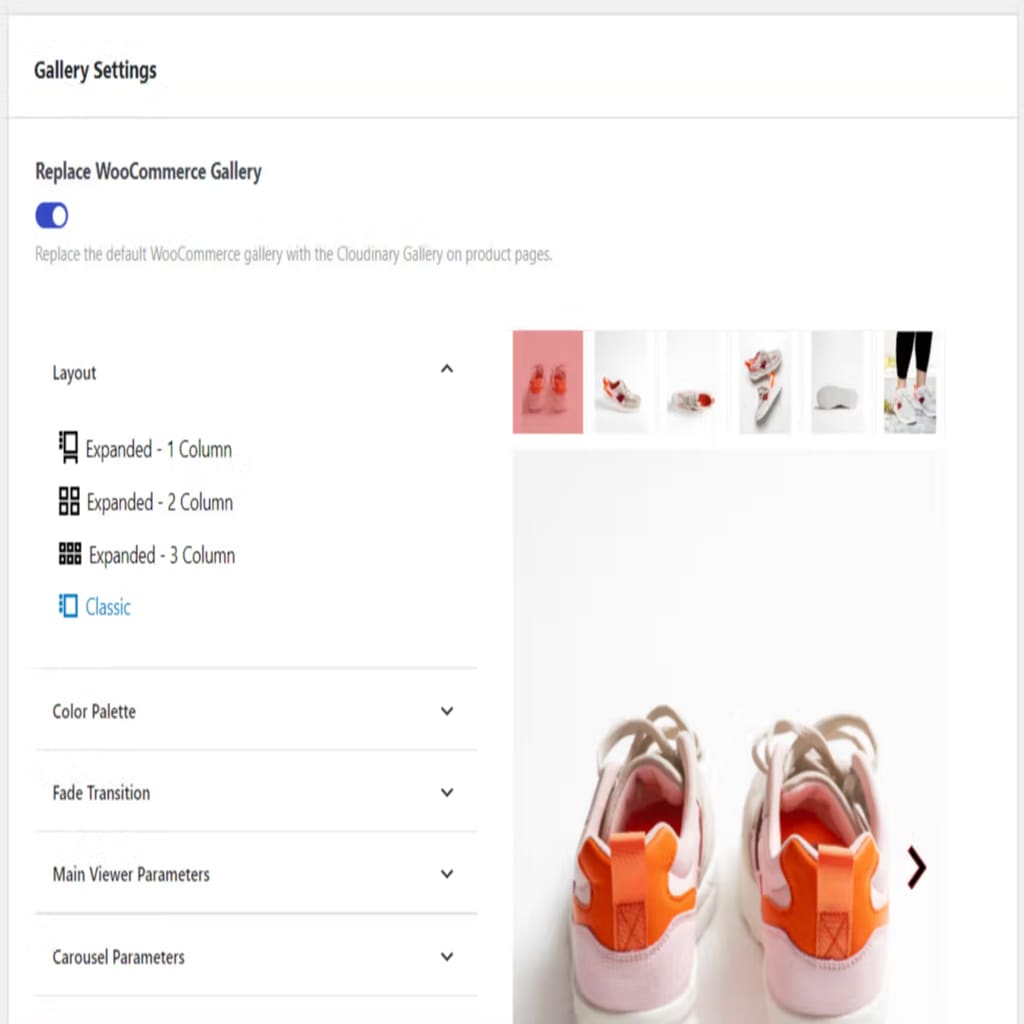
This way, you can improve product page load times by ensuring you’re using pre-optimized images.
Step 6: Transform your images
Cloudinary lets you control how your images get served to your users with more parameters than just quality and format.
Its dynamic URL transformations let you generate image variations on the fly without any design or editing tools. You have the option to build the URLs yourself or use Cloudinary’s SDKs in your preferred language or framework.
For example, take the image below:
Apply the following transformations via URL:

l_docs:academy-award/c_scale,fl_relative,h_0.6/c_crop,g_auto,h_0.9,w_0.7/fl_layer_apply,g_south_east/co_white,l_text:AlexBrush-Regular.ttf_250:James%20Stewart%20/co_black,e_outline/fl_layer_apply,g_south,x_30,y_30/
And you get this:
You can use this feature to programmatically serve images with everything from simple filters to crop jobs that rely on face detection.

Step 7: Explore add-ons
If the built-in tools aren’t enough for you, Cloudinary offers a collection of add-ons, including:
Google Translation, which translates auto-generated tags into different languages.
Aspose, which automatically converts Microsoft Office documents into PDF or another image format.
URL2PNG for taking screenshots of public websites.
WebPurify for automated moderation of all images uploaded to your site.
Step 8: Test WP-CLI functionality
The Cloudinary WordPress plugin also includes two WordPress Command Line Interface (WP-CLI) commands:
wp cloudinary analyzeThis reviews your media library to provide a breakdown of assets, showing how many are currently “synced”, “unsynced”, or “unsupported”.
wp cloudinary syncThis will start syncing any unsynced assets to Cloudinary. It serves as an alternative way to handle bulk asset synchronization.
Step 9: Configure the connection string
The connection string can also be set as a constant to avoid anyone being able to easily change out the Cloudinary settings.
To do this, just add the following line of code to your site’s wp-config.php file:
define( 'CLOUDINARY_CONNECTION_STRING', 'cloudinary://key:secret@cloudname' );Cloudinary + WordPress — helpful documentation
We’ve put together a list of helpful resources to help you with your Cloudinary + WordPress configuration effort:
Get started with WordPress media optimization
Cloudinary is undoubtedly useful, but a lot of its most interesting features are overkill for a lot of websites. Its CDN is the most broadly useful, but you have to jump through so many hoops to access it.
A CDN built right into your hosting, one that optimizes your performance without you having to think much about it, is the better solution.
Consider using Liquid Web for your WordPress cloud hosting, which includes a custom in-house CDN with easy plugin integrations. We offer the one-click staging site creation feature to test out content changes, new plugins, and theme changes.
Liquid Web offers the widest range of hosting options specifically designed for WordPress sites — from a simple VPS, to WordPress cloud hosting, to dedicated WordPress servers for enterprise organizations. You choose your favorite OS and the level of management support you need. Get in touch today.
Additional resources
How to build a WordPress site →
A complete beginner’s guide
CDN vs eCDN →
How they work, how they compare, and how to choose
What is the WebP image format? →
And what makes it different from other image formats?

Luke Cavanagh, Strategic Support & Accelerant at Liquid Web, is one of the company’s most seasoned subject matter experts, focusing on web hosting, digital marketing, and ecommerce. He is dedicated to educating readers on the latest trends and advancements in technology and digital infrastructure.