Disable a Cron Job in Cloud Sites
Disable a scheduled Cron job in your Cloud Sites control panel by deactivating the Cron or deleting it entirely.
Disable a scheduled Cron job in your Cloud Sites control panel by deactivating the cron or deleting it entirely. This tutorial guides you through both functions in your control panel.
Our first step is to log into your Cloud Sites control panel, navigating to the website details the cron is active on.

Deactivate a cron
Deactivate a cron will stop it from running without deleting it entirely. You can always reactivate the cron at a later date if you need to.
- Open your Crons list.

- Click on the gear icon next to the name of the cron you want to deactivate.
- A drop-down menu will appear, select Update Cron.

- The cron details will appear in a pop-up window.

- Unclick Active in the Status at the top of the pop-up.

- Click Update Cron to complete the deactivation process.

- Your cron will now have a gray box on the left-most column in the Crons list signifying the cron has been deactivated.


Delete a Cron
Deleting a cron no longer in use will remove it from cluttering up your Crons list.
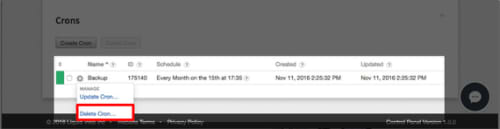
- Click on the gear icon next to the cron you want to delete.
- Select Delete Cron from the drop-down menu.

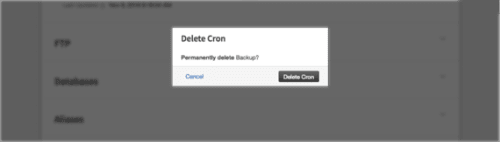
- A pop-up will appear to confirm that you want to delete the cron permanently.

- Click on Delete Cron.
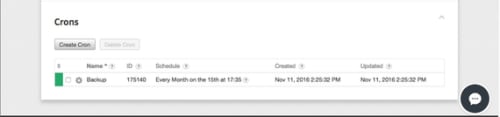
- Once the cron has been deleted, it will no longer appear in your Crons list.