Installing a Service SSL in InterWorx Web Panel
SSL’s help to protect your website and verify that your server is legitimate and owned by you (you can learn more about SSL Certificates in What Is an SSL Certificate?). While SSL’s are most often used for individual sites or domains, a service SSL encrypts traffic for other services like FTP, email, etc.
By default, your InterWorx server includes self-signed SSL certificates for services. While these self-signed certificates are just as secure, they will cause an error in some browsers as they aren’t verified by a Certificate Authority. If you’d like to install a verified SSL for services, you can install an existing certificate or use Let’s Encrypt to create a certificate.
Installing a Service SSL from an Existing Certificate
To use an existing SSL certificate, you either need to have the certificate installed on a domain on the server or have the Private Key, the SSL Certificate, and the SSL Chain Certificate (if desired).
- Login to NodeWorx as the administrator. See Logging into Interworx Web Panel.
- Expand the Server menu, then click on SSL Certificates.
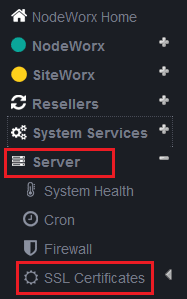
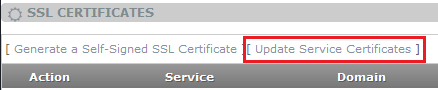
- This opens the Service SSL Certificates screen. To add an existing SSL certificate, click on Update Service Certificates.
- Choose the certificate source from the drop-down (select copy/paste if you have the certificate information. Select Domain if the certificate is installed on another domain).
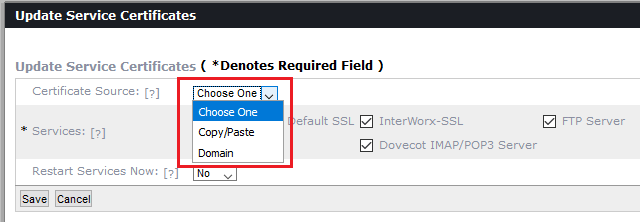
- Select the services you want to use the SSL. Click Save to apply the SSL.

Using Let’s Encrypt to Install a Service SSL
You can use Let’s Encrypt (a free SSL provider) to install service SSL’s after you complete an additional step. By default, InterWorx does not create a domain with the name hostname.domain.com. Because service SSL’s are actually applied to the full host name of the server, you first have to create a domain with that name in NodeWorx (you will also need to create a DNS entry for hostname.domain.com).
- Create the domain host.domain.com (replace this with the actual hostname of your server. You can find your full server hostname at the top of the Home screen in NodeWorx). For information on creating a domain, see Creating a User Account/Domain in Interworx Web Panel.
- Create an SSL Certificate for the domain in SiteWorx using Let’s Encrypt. For information on creating the SSL, see Using Let’s Encrypt in Interworx Web Panel.
- Login to NodeWorx as the administrator. See Logging into Interworx Web Panel.
- Expand the Server menu, then click on SSL Certificates.
- This opens the Service SSL Certificates screen. To add an existing SSL certificate, click on Update Service Certificates.
- Choose Domain as the certificate source from the drop-down menu. The choose the host.domain.com domain you created in step 1.
- Select the services you want to use the SSL. Click Save to apply the SSL.