Changing Your Website IP Address in WHM
Normally, your website IP address will update automatically in WHM during the migration process. However, if you add additional sites and they need their own individual IP address for mail services and other applications, you can create an IP pool and then update the site manually.
Before you change your site’s IP address, you will need to add IP addresses in your server. You can do this either by creating a pool or by adding them individually. See our articles Creating an IP Pool for Your Cloud VPS and Adding IP Addresses Manually in WHM to find out how to add them.
Warning: |
| Changing an IP address because yours has been blacklisted is not best practice. Because of the way blacklists are tracked and monitored, it is best to rectify the situation by contacting the blacklist and following their removal procedures. |
Change Site IP in WHM
- Log in to your server’s WHM panel. (See Getting Started with WHM)
- Type “ip” into the search bar on the left hand side of the page.

- The menu will show the Account Functions, you have two choices for changing IP addresses:
- Changing the IP for a single site – click Change Site’s IP Address
- Changing the IP for multiple sites – click Change Multiple Site’s IP Addresses

Change IP For a Single Site
- Select Change Site’s IP Address from the menu on the left hand side of the page.

- You will be directed to a page showing all the sites on your server. Select the site you want to change by clicking the radio button next to the site name.

- From this page, click Change to be directed to the page to change your site’s IP address.
- From the Change Site’s IP Address home page, select the IP address from the drop-down menu under the site listed on the page.
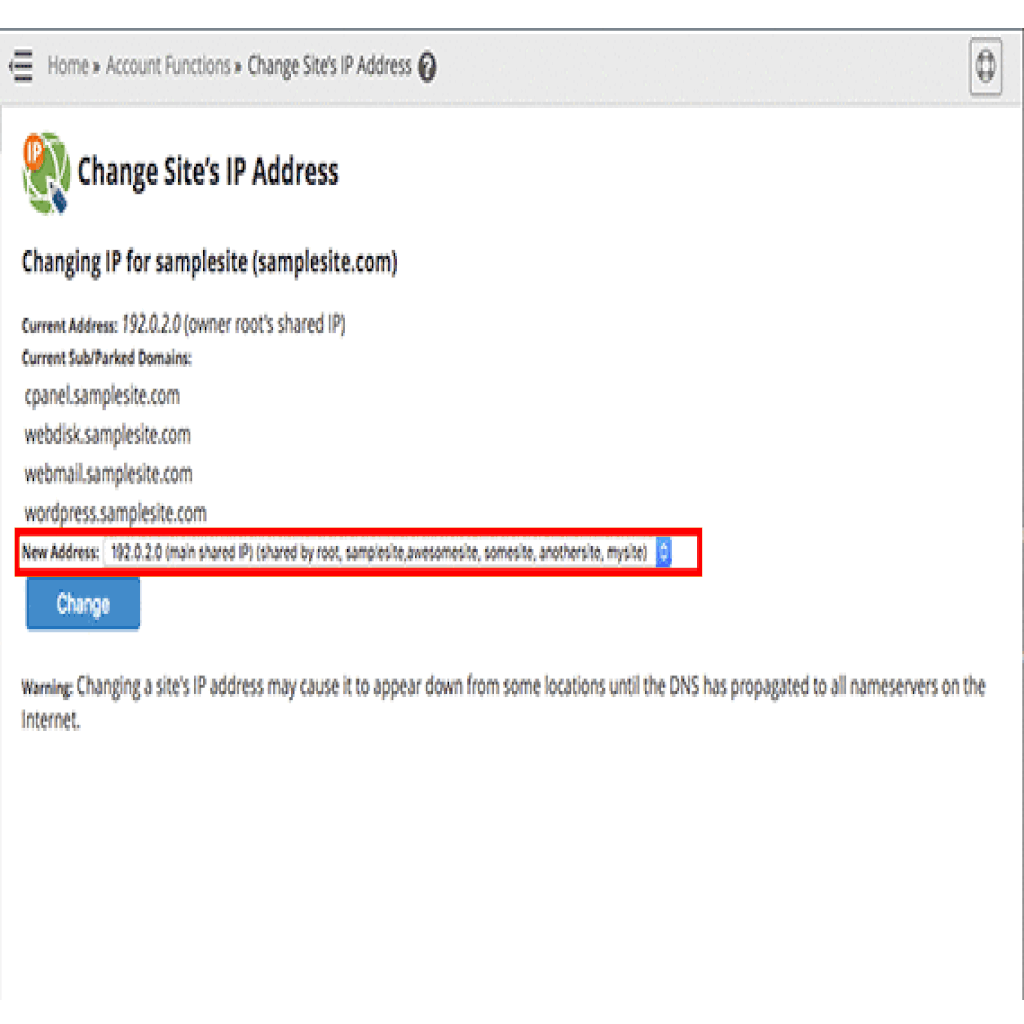
- Click Change to change the IP address for the site you’ve selected.

- Once the IP is changed, you will need to update the A Record wherever your DNS records are hosted. See our article Adding and Editing DNS Records to learn how.
Change IP For Multiple Sites
- Select Change Multiple Site’s IP Addresses from the menu on the left hand side of the page.

- You will be directed to a page showing all the sites on your server. Select the sites you want to change by clicking the box next to the site names, you can select all sites or just a few.

- Click Change IPs of Selected Accounts to open the page that will show your sites and select the IP address you’d like to assign to your sites.

- Choose from the drop down menu for each site the new IP address you want to assign. Click Change IPs to update the IP address for that site.

- Once the IPs are changed, you will need to update the A Record wherever your DNS records are hosted. See our article Adding and Editing DNS Records to learn how.