Accessing Your Cloud Drive for Premium Business Email Plus
One of the benefits of upgrading your Premium Business Email (PBE) account from Standard to Plus is access to the Cloud Drive. The Cloud Drive provides an additional 30 GB of storage space on your email account for important files that you want to be able to access from anywhere. To see how to upgrade your PBE account, see Upgrading Standard Premium Business Email to Plus. You can access your Cloud Drive directly from your Liquid Web Webmail or you can download a client for convenient access on your desktop.
Liquid Web Webmail
- Log in to the Liquid Web Webmail to access your inbox, cloud drive, calendar, and contacts. No setup or configuration is required.

- From the Cloud Drive panel, you can upload files, create new files and folders, and download files and folders to your computer using the options in the “New” menu. You can also upload files to the drive using “drag and drop”, making the process even easier.

Cloud Drive for Desktop
To get the most out of Liquid Web Email Plus, install Cloud Drive for Desktop directly from the Cloud Drive web application. Access the web application by logging in to your Webmail and clicking the Install Now button. NOTE: these instructions are for Windows 8/10 (minimum requirement). If you have a different operating system (like Mac OS, at least El Capitan) and need additional help, see Using the Email Help Tool for Premium Business Email and Hosted Exchange.

- Once the Cloud Drive Client is downloaded, you’ll double-click the installer file to begin the installation. You should see the following screen:
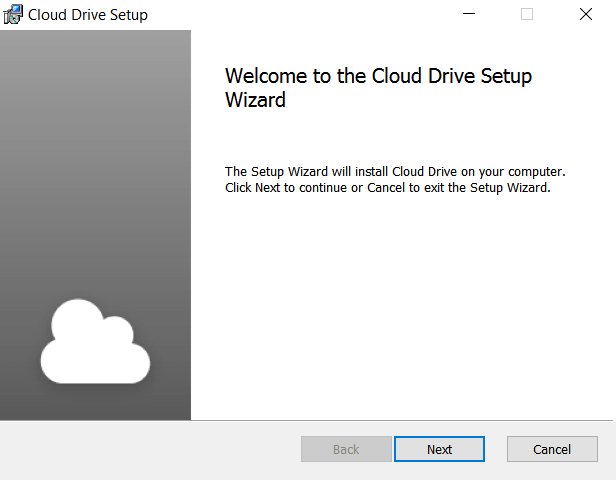
- Click Next on the Welcome screen.

- Click Install to begin the installation.

- Read the End-user License. If you accept the terms, click the box next to “I accept the terms in the License Agreement”. Then click the Next button to install.

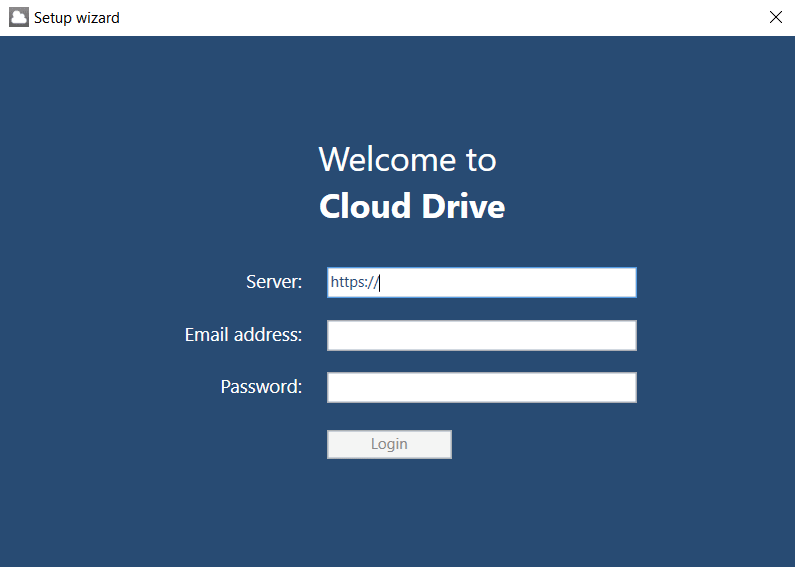
- Once the installation completes, you will be taken to the Setup Wizard. Enter the following information
- Server: The URL you use to access your webmail (https://webmail.emailsrvr.com).
- Email address: your Premium Business Email address.
- Password: the password you use to access your email.
- Click Login.
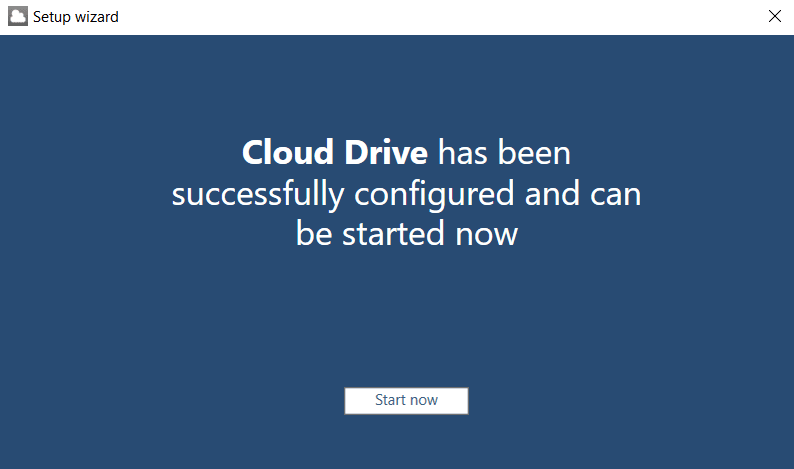
- Once complete, you’ll see a confirmation screen indicating that Cloud Drive has been successfully configured. Click Start Now to launch the application.
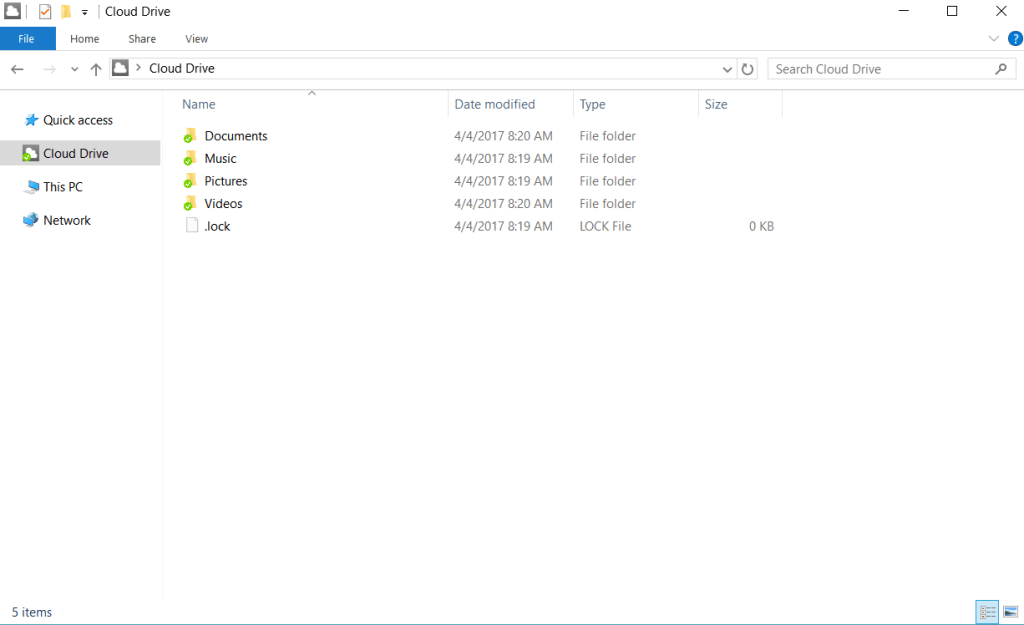
- You can access your Cloud Drive at any time using the file browser to open the Cloud Drive folder. Folders/files with a green checkmark have been successfully synced with the cloud.
If you need more help setting up your Cloud Drive, you can use the Email Help Tool, see Using the Email Help Tool for Premium Business Email and Hosted Exchange.