Restarting a Virtual Machine on your OpenStack Server
Rebooting an OpenStack Server instance from your Liquid Web account is a simple process and only takes a few clicks. Make sure to save any configuration changes prior to rebooting.
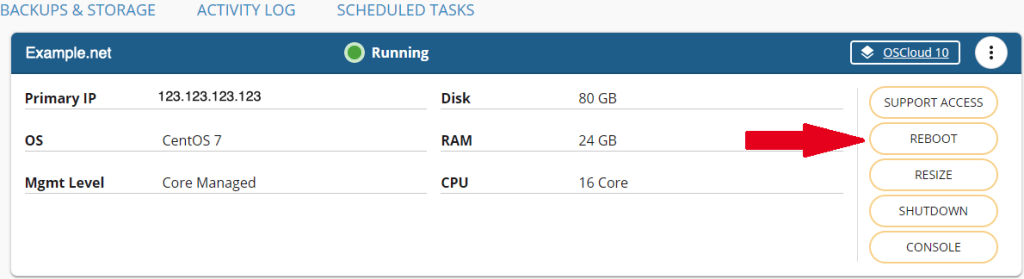
To begin with you’ll need to navigate to the server details page for the particular server instance that you will be rebooting. If you’re unfamiliar with navigating to the server details page in your My Liquid Web account please see our article Exploring Your My Liquid Account.
Rebooting an OpenStack Server Instance
- From the server details page click the reboot button.
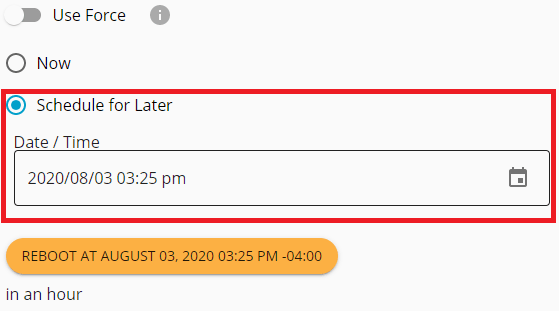
- A reboot dialog window will pop up. You can choose to reboot now, in which case the server will be rebooted immediately. If the server is unresponsive you can select the ‘Use Force’ option. This will force the server to reboot.

Scheduling an OpenStack Server Reboot
- From the reboot dialog window click the more options button. A new page will open where you will select the ‘Schedule for Later’ option.
- Click the calendar button to select the date and time for the reboot.

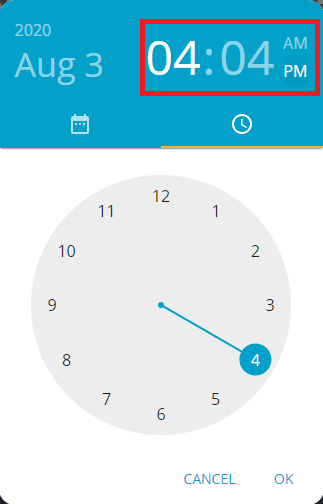
- Now select the date for the reboot.

- To set the time of the reboot select the hour, minute and AM or PM. When finished click ‘OK’.
- Click the ‘REBOOT AT’ button to schedule the reboot.

- The next page will indicate the reboot has been scheduled successfully. The scheduled reboot can be canceled from this screen as well.

Scheduled reboots and other scheduled talks can be viewed from the Server Details page. For more information on scheduling tasks, please see our article Scheduling Tasks in Your Liquid Web Account.