Allowing Remote Database Access in Interworx
The InterWorx Control panel allows the ability to manage multiple external MySQL servers from a single installation of InterWorx, via MySQL server pooling. Once added, the remote MySQL Servers may be assigned to new SiteWorx accounts.
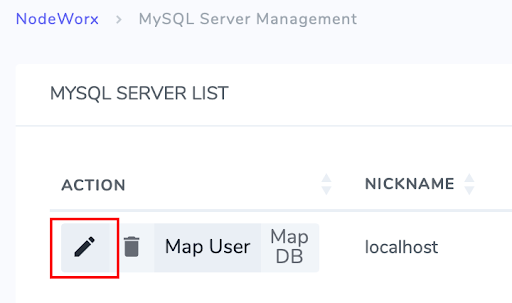
From the Remote Servers page in NodeWorx, server administrators can add and remove remote MySQL servers, as well as change the remote MySQL server root MySQL password, and terminate running MySQL queries.
NOTE: |
| The external MySQL server must allow remote connections from the InterWorx server. For the initial setup, a root-level MySQL username and password must also be provided. |
Add a Remote MySQL Server
- Log into NodeWorx from the browser (https://ip.ad.dr.ess:2443/nodeworx). For more information on logging into NodeWorx, see Logging into Interworx Web Panel.
- In NodeWorx, navigate to System Services > MySQL Server > Remote Servers. Click Remote Servers to open the Remote Servers window.
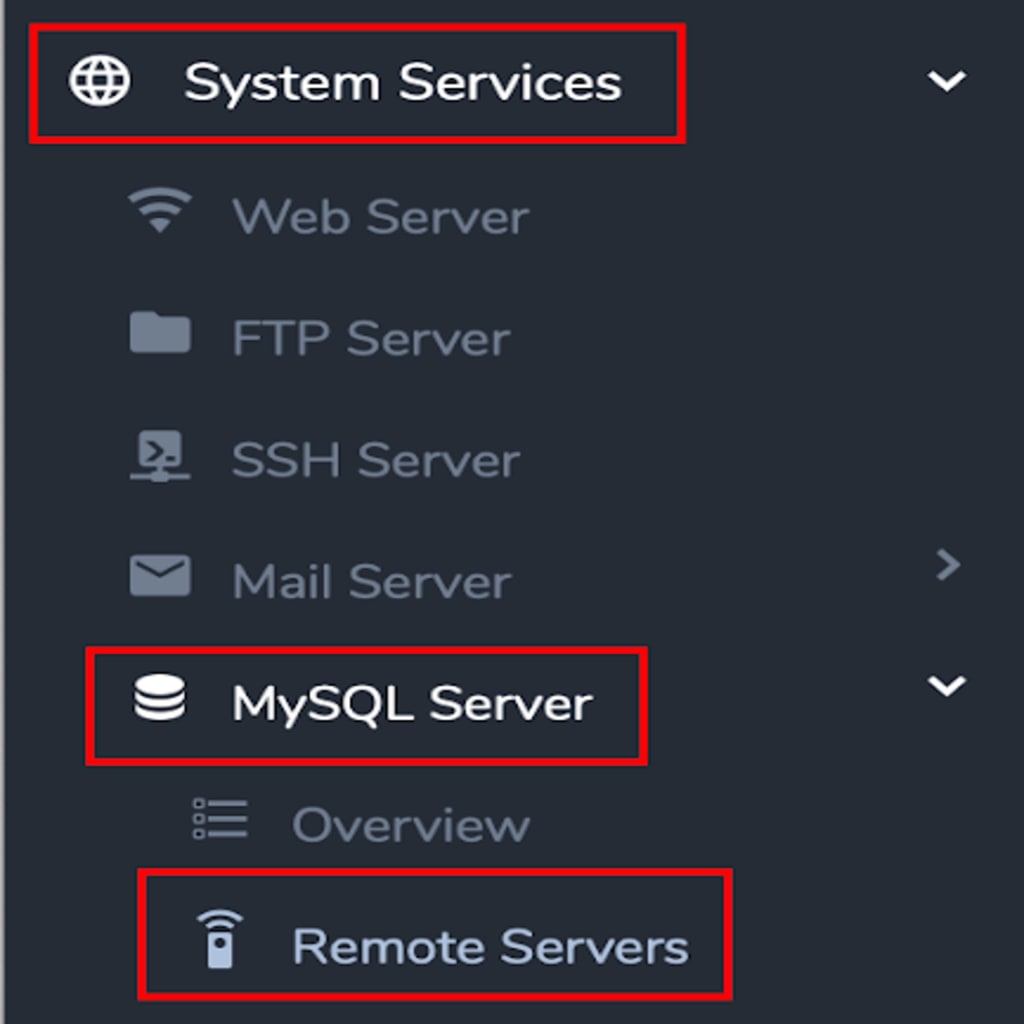
- Click +. This opens the Add MySQL Server form.


- Update the required fields:
- Nickname: Nickname for the remote MySQL server.
- Host: The remote MySQL server’s hostname or IP address, and port, if required.
- Database Root Username: The root MySQL username of the remote server. This is not the same as the system root user.
- Database Root Password: The root MySQL password for the remote server. This is not the same as the system root password.
- Click Add to finish adding the mysql server.
Manage the Remote MySQL Server
Editing the Remote Server MySQL Root Password
- Log into NodeWorx from the browser (https://ip.ad.dr.ess:2443/nodeworx).
- In NodeWorx, navigate to System Services > MySQL Server > Remote Servers.
- Click the Pencil next to the Remote Server. This opens the MySQL Server Control page.
- Under MySQL Root Password update the Password and Confirm Password options with the new password.

- Click Save.
Editing the Remote Server Nickname
- Log into NodeWorx from the browser (https://ip.ad.dr.ess:2443/nodeworx).
- In NodeWorx, navigate to System Services > MySQL Server > Remote Servers.
- Click the Pencil next to the Remote Server. This opens the MySQL Server Control page.
- Under MySQL Server Nickname, update the Nickname field with the new nickname.
- Click Save.
Terminating Running MySQL Queries on the Remote Server
- Log into NodeWorx from the browser (https://ip.ad.dr.ess:2443/nodeworx).
- In NodeWorx, navigate to System Services > MySQL Server > Remote Servers.
- Click the Pencil next to the Remote Server. This opens the MySQL Server Control page.
- Under Current MySQL Processes, select the checkbox next to the processes/queries to be terminated.
If there are no active or running processes, the Current MySQL Processes section will state “No Active MySQL Processes/Queries”.
- From the With Selected dropdown, select Terminate.
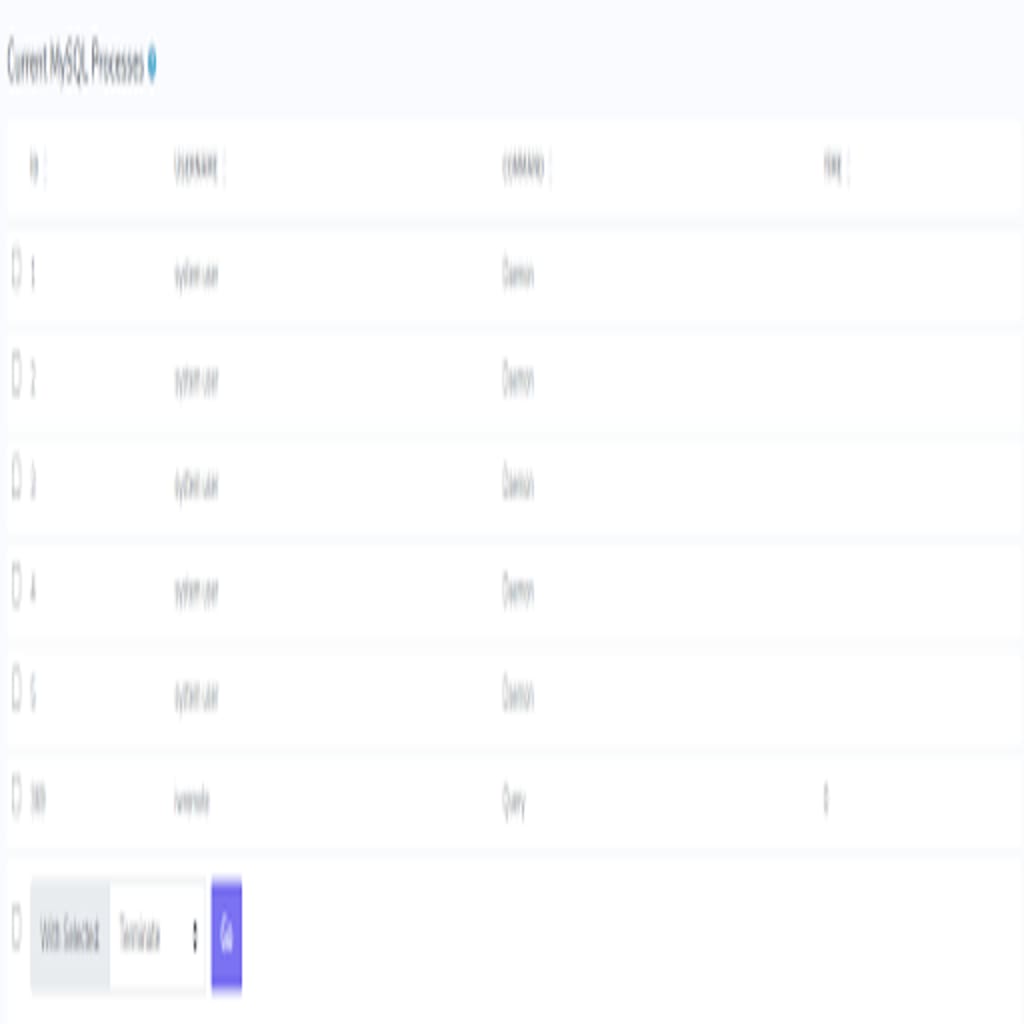
- Click Go.
Remove a Remote MySQL Server
NOTE: |
| Once a MySQL server is in use by a SiteWorx account, it cannot be removed until that SiteWorx account has its databases transferred to another MySQL server |
- Log into NodeWorx from the browser (https://ip.ad.dr.ess:2443/nodeworx).
- In NodeWorx, navigate to System Services > MySQL Server > Remote Servers.
- Click the Trashcan next to the Remote Server.

- This opens the Delete Confirmation form.
- Click Delete.
Transfer SiteWorx Accounts Between MySQL Servers
Changing the database server that a SiteWorx account uses can only be done via the command line at this time
NOTE: |
| Existing databases, users, permissions will still remain on the original server after the transfer, and will need to be removed, manually. The transfer script also does not update any application connection string, so they must be updated, manually, as well. |
>WARNING: |
| Before attempting a database server transfer, it is highly recommended to first back up the SiteWorx account |
- Log in to the server at the CLI as root, either via SSH or from the terminal.
- At the CLI, run the InterWorx SiteWorx database transfer script. It has two required parameters:
~iworx/bin/iworxdb-transfer.pex --domain {domain} --new-server-nickname {remote server nickname}| Parameter | Description |
| –domain {domain} | Domain of the SiteWorx account |
| –new-server-nickname {remote server nickname} | Nickname of the MySQL Server where the SiteWorx databases will be transferred |
There are also several optional flags that may be used when transferring SiteWorx databases between MySQL servers:
| Parameter | Description |
| –force | Transfers all databases, regardless of any collisions. WARNING: If a collision is found, the existing database on the new server will be dropped and replaced with the new database |
| –dont-transfer-data | Only assigns the SiteWorx account to use the new server for MySQL. Does NOT transfer existing MySQL users or databases |