How to Install KVM on AlmaLinux — Step-by-Step Guide
Introduction
Virtualization unlocks the power to run multiple operating systems on one physical server, saving costs and maximizing efficiency. On AlmaLinux, the Kernel-based Virtual Machine (KVM) provides a stable, open-source virtualization platform that transforms your server into a flexible environment for running virtual machines (VMs).
Prerequisites
Before you begin, make sure your system meets the following requirements:
- Operating system: AlmaLinux OS 8
- CPU: Intel VT-x or AMD-V enabled (hardware virtualization support)
- RAM: At least 4 GB (more recommended for multiple VMs)
- Disk space: Minimum 20 GB free for VM images
Step-by-Step Instructions
- Run the following command to check if your CPU supports virtualization.
egrep -c '(vmx|svm)' /proc/cpuinfo
- Update AlmaLinux by running the following command:
sudo dnf update
- Install KVM, Libvirt, and related administration utilities
sudo dnf install qemu-kvm libvirt libvirt-client virt-top virt-install virt-manager virt-viewer libguestfs-tools- Activate the libvirt service to manage your virtual machines:
sudo systemctl start libvirtd
sudo systemctl enable libvirtd- Configure a bridge interface by editing the interface file. This allows your virtual machines to communicate externally. First, open the ifcfg-br0 configuration file:
sudo nano /etc/sysconfig/network-scripts/ifcfg-br0
- Add the following values, matching the values your network’s current configuration:
DEVICE=br0
TYPE=Bridge
BOOTPROTO=none
ONBOOT=yes
IPADDR=<your_bridge_ip>
NETMASK=<your_netmask>
GATEWAY=<your_gateway>
DNS1=<your_primary_dns>
DNS2=<your_secondary_dns>- DEVICE=br0: This specifies the name of the network interface. br0 is a common and conventional name for a bridge interface.
- TYPE=Bridge: This clearly identifies the interface type as a bridge, which is used to connect multiple network segments together.
- BOOTPROTO=none: This setting indicates that the network interface will not obtain an IP address automatically via protocols like DHCP. Instead, it will use a static IP address, which is defined by the following lines.
- ONBOOT=yes: This ensures that the bridge interface is activated automatically when the system starts up.
- IPADDR=<your_bridge_ip>: This is where you enter the static IP address you want to assign to the bridge. This IP address allows the host machine to communicate on the network through the bridge.
- NETMASK=<your_netmask>: The netmask defines the network portion of the IP address, which is essential for routing traffic correctly within the local network.
- GATEWAY=<your_gateway>: The gateway is the IP address of the router that allows traffic to leave the local network and reach the internet.
- DNS1=<your_primary_dns> and DNS2=<your_secondary_dns>: These are the IP addresses of the Domain Name System (DNS) servers that the system will use to resolve domain names to IP addresses.
- Edit your Ethernet interface file by opening the following file:
sudo nano /etc/sysconfig/network-scripts/ifcfg-eth0
- Add or modify to following configurations:
DEVICE=eth0
TYPE=Ethernet
ONBOOT=yes
BRIDGE=br0
- Restart the network service:
sudo systemctl restart network
You are now ready to create your own virtual machine! Create a virtual machine with the AlmaLinux 8.4 ISO, by running:
sudo virt-install --name your_virtual_machine_name--ram=2048 --vcpus=2 --cpu host --hvm

--disk path=/var/lib/libvirt/images/almalinuxservervml,size=20

--cdrom /var/lib/libvirt/boot/AlmaLinux-8.4-x86_64-DVD.iso --graphics vnc
– TIP –
- –name: A unique identifier of your virtual machine
- –ram: Memory allocation in MB
- –vcpus: Virtual CPUs
- –disk: Disk size and location
- –cdrom: Path to ISO file
- –graphics vnc: Enables graphical console
- Find your VNC display port:
sudo virsh domdisplay your_virtual_machine_name- After completing the AlmaLinux installation, you can verify the virtual machine’s status by listing all machines (active and inactive) with this command:
sudo virsh list --allUpdate the KVM
- Update the KVM and any related packages, by running the following command:
sudo dnf update qemu-kvm libvirt libvirt-client virt-top virt-install virt-manager virt-viewer libguestfs-toolsUninstall or remove the KVM
- Uninstall the KVM and related packages, by running the following commands:
sudo dnf remove qemu-kvm libvirt libvirt-client virt-top virt-install virt-manager virt-viewer libguestfs-toolsFrequently asked questions
Managing your Virtual Machine After Installation
Want to learn more about managing your virtual machine? Check out our article on Managing your virtual machine with Virsh.
You can access the Virtual Machine console via:
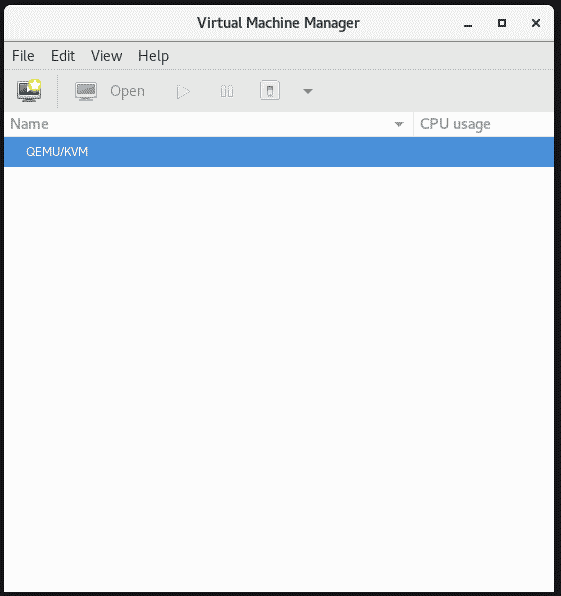
sudo virt-viewer AlmaLinux-serverOr manage it graphically with Virt-Manager:
sudo virt-managerThis command will pop open the Virtual Machine Manager interface as shown:
With KVM installed and your first Virtual Machine running, your AlmaLinux server has transformed into a full-fledged virtualization host—ready to handle multiple workloads, test environments, or production servers.
Official documentation:
- https://origin.kernel.org/doc/html/latest/virt/kvm/api.html