Setting Up Custom (Private) Nameservers in WHM
Nameservers are vital to making the Domain Name System (DNS) work. Their one job is to tell other servers how to match up domain names with IP addresses. Some people prefer to use private nameservers, also called custom nameservers or vanity nameservers. This is when you host your own DNS, instead of using one of Liquid Web’s nameservers. DNS queries will ask your nameservers where to find your website. For example:
NOTE: |
| Using Custom Nameservers can make it more difficult for Liquid Web to support DNS issues and could make your sites inaccessible, especially if you are using any of our Managed Sites Products. |
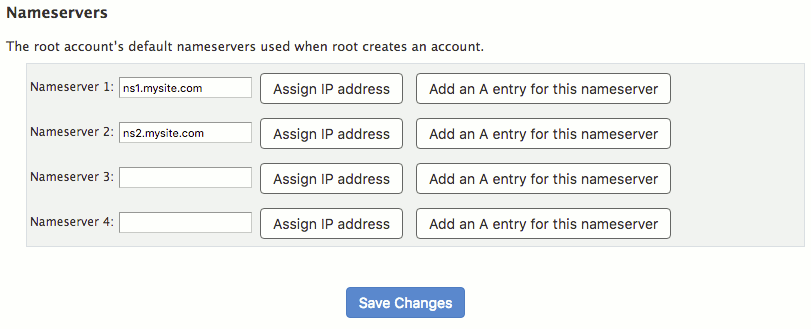
It’s usually easiest to create nameservers on a domain you already own. So, if your server is registered as host.mysite.com, creating nameservers at ns.mysite.com and ns1.mysite.com prevents you from having to pay for another domain name. It also makes clear which nameservers belong to which server.
This article is designed for Linux servers that use WHM. There are three parts to setting up private name servers:
Defining Nameservers in WHM
- Log into WHM. If you aren’t familiar with WHM, read Getting Started with WHM.
- In the left navigation, click on Basic cPanel & WHM Setup under Server Configuration.

- On the Basic cPanel & WHM Setup page, scroll all the way to the bottom and find the Nameservers section.
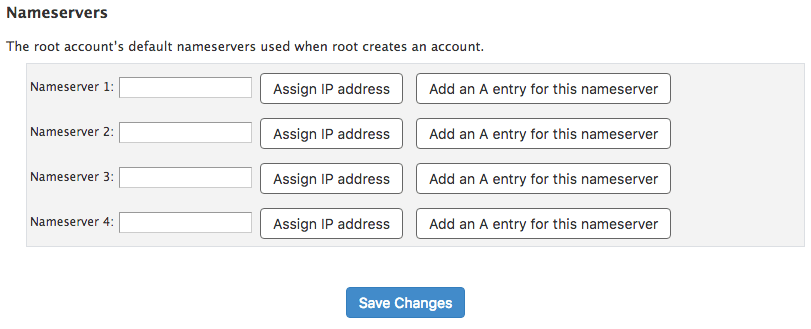
- Enter your nameserver addresses. You need to enter at least 2 nameservers for redundancy.

- Next to each nameserver you enter, click Assign IP Address. Once your assignment has been confirmed, you can close the pop-up box.

Tip: IP Addresses
If you see an error message that says “You are out of IP addresses that you can assign as nameservers,” you need to purchase another IP address. We have full instructions to help you do this. - Now, click Add an A entry for this nameserver for each nameserver you enter. Then click Add Entry and close the pop-up box.
- Once you’ve added your two (or more) nameservers to WHM, make sure to click Save Changes.
Registering Your Nameservers
Even though you’ve already registered your server’s domain name, you will have to register your nameservers with your domain registrar. This will usually be free, but it depends on your registrar. If you registered your domain through your Liquid Web account, just follow these steps:
- Log in to your Liquid Web Account.
- Click on the Domains tab.

- Click on the name of the domain for which you want to register a private nameserver, Then, click Register a Name Server.

- Enter the host name and select the IP address of your server that will be hosting DNS records for your domain. Click Add to complete.

If you registered your domain at a domain registrar before setting up your Liquid Web server, you need to register your nameservers with that domain registrar. Log into your account with your registrar and register your nameservers. This isn’t the same as registering a new domain: your registrar should have specific instructions for registering nameservers. Most registrars have a simple form to fill out with your nameserver domains and the IP address assigned to the nameserver.
If you aren’t sure how to register your nameservers, contact your registrar. After you have registered your nameservers, you can redirect your domains so they start using the new private nameservers.
Redirecting Your Domains
The last part of setting up private nameservers is to make sure your new nameservers are serving your DNS records instead of your old nameservers. Just like registering your nameservers, this is done at the registrar level instead of the server level. If you registered your domain with Liquid Web, see our article Changing Your Website’s Nameservers to learn how to set up your domains to use your new nameservers. If you registered your domain somewhere else, you’ll need to log into your account at your registrar, find the domain you want to use with your private nameservers, and ensure the nameservers are your new private nameservers instead of the registrar’s default name servers.
Tip: DNS Records |
| After you redirect your domains, double-check your DNS records to make sure they use your new private nameservers. Otherwise, your sites won’t resolve properly and will not load. Once you are using private nameservers, you will make all your DNS changes in WHM. In the DNS Functions section in the left navigation menu, you can open the DNS Zone Editor by clicking on Edit DNS Zone. You will no longer be able to edit DNS records from your Liquid Web account. |