Storing Images in Object Storage
Introduction
Using Object Storage to store your backups is a great way to free up disk space. Along the same lines, you can also increase the performance of your website by letting your server continue to handle PHP scripts and SQL queries while your images load from your Object Storage.
There are two steps needed to have your images load from Object Storage:
Step by step instructions
Upload and Set Permissions
If you haven’t installed and configured DragonDisk, please follow the instructions in our article What is Liquid Web Object Storage? before proceeding with these instructions. By default, images are not viewable from the internet until you adjust the security permissions.
DragonDisk is a third-party software that provides a graphical interface to help you interact with your files when using Cloud Object Storage. Any issues with the service falls beyond our support offerings. For more information about our support system, see Management and Support Levels.
- Once you have uploaded an image via DragonDisk, Right Click on the file, select Properties, and then click on the Security tab:
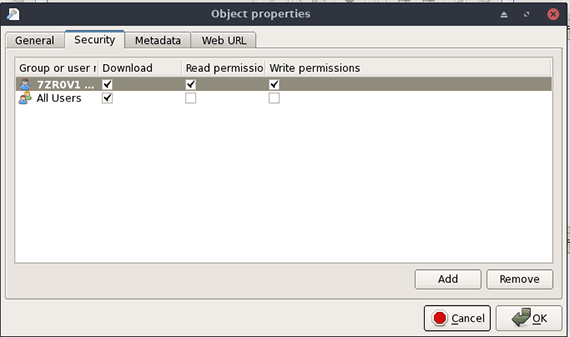
- Simply click on Add to add the All Users group and then select Download. Once you’ve clicked on OK the image is now viewable in any web browser.

You can also accomplish this by using aws cli. One benefit of using aws cli is that you can bundle several operations into one command. For example, if you run the following command inside of the folder with all of the images, it will upload them to your bucket AND set the permissions on all of them so that they can be viewed from a browser:
aws --endpoint-url https://objects.liquidweb.services s3 sync . s3://bucketname --recursive --acl public-read-writeUpdate CMS/Website
- In DragonDisk click the Web URL tab.
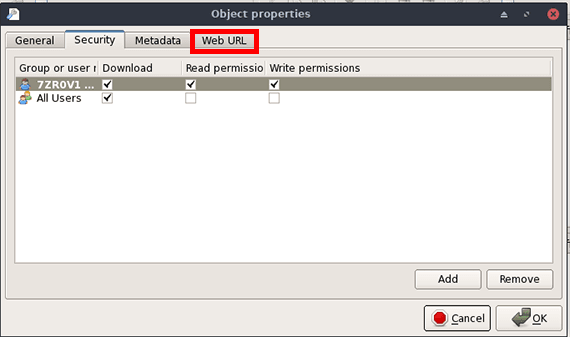
- This tab will display the URL you can use in a web browser and how you’ll refer to the image in your CMS or website.

- In this example, https://jeffg.objects.liquidweb.services/u_american_crow.jpg is the URL and you can use either http or https. To utilize this in your website, the procedure would be the same if you had purchased a CDN solution in that you or your developer would need to update your site’s code. Update your images with the URL, it should look something like this in your website code:
<p><strong><img style="float: left;" src="https://jeffg.objects.liquidweb.services/u_american_crow.jpg" alt="" border="0" /><br /></strong></p>Nothing special needs to be done, just simply change your image references to the URL and you are all set.