
 Ronald Caldwell
 Domain aliases (parked domains) are domains you own that contain no content. Instead, they point to another domain or subdomain on your account. Aliases help hold a domain you will sell or redirect traffic to another domain.
This tutorial shows you how to create a domain alias in cPanel.
This functionality is no longer available in cPanel version 106 and has been removed with the switch to the Jupiter theme. It is recommended to set up new domains in a separate cPanel account.
Requirements
- A server, such as a VPS, running cPanel
- cPanel login credentials.
- The domains used as aliases must be registered with a valid registrar and configured to point to your DNS servers before being used as an alias.
Create a Domain Alias in cPanel
1. Login to cPanel.
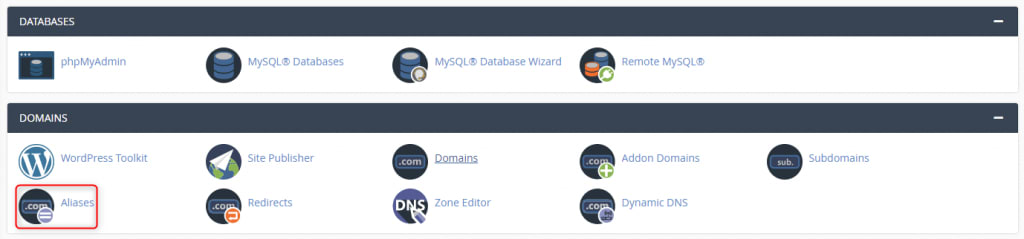
2. Under Domains, click Aliases.
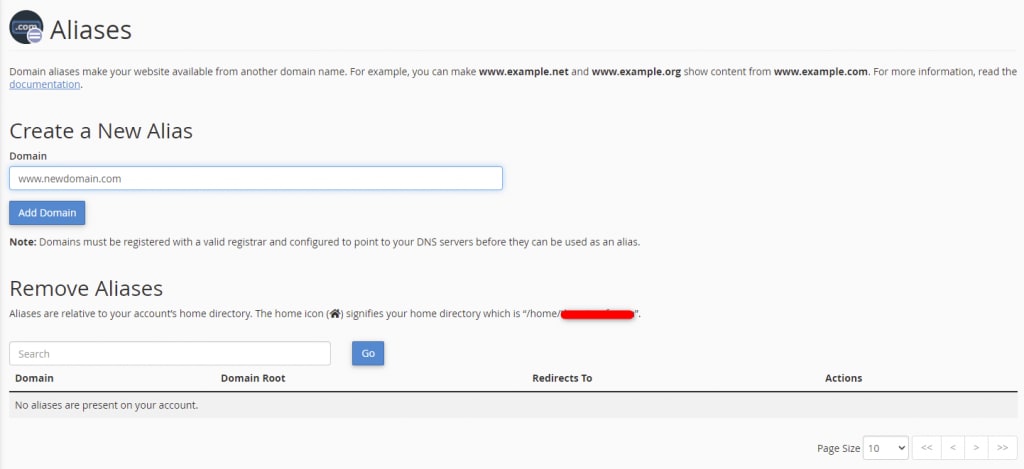
3. From this page you can create, manage, and remove domain aliases. In the Domain textbox, enter the new domain and click Add Domain. A green confirmation message appears advising the alias is created.
4. Be sure your domain alias’s DNS settings to the same as your main domain, so the redirection will work properly.
Wrapping Up
Creating domain aliases in cPanel helps to point traffic to another of your domains or help with your parked domains. Using this guide helps you get it done and get back to building meaningful sites and content.
Liquid Web’s 24/7/365 support for cPanel servers is available to our existing customers. If you would like to get the managed experience on our VPS hosting, cloud servers, and dedicated servers with cPanel, contact our sales team right away.