


How to Upgrade Your VPS
Upgrading your Storm® VPS (Virtual Private Server) is a simple process, and can be done in just a few satisfying clicks. Upgrades and making sure you are properly backing up your VPS are a necessity. Let’s face it, you work hard on your blog, or e-commerce store, and the traffic grows! That is why understanding Cloud VPS and maintaining it are so important. So, once you’ve optimized your WordPress site or Magento store, reward yourself with an easy upgrade process and increase the available resources to your Storm® VPS by following the steps below!
Preflight Check
- These instructions are intended specifically for upgrading your Storm® VPS (Virtual Private Server).
Step #1: Login to Manage; Select the Server to Upgrade
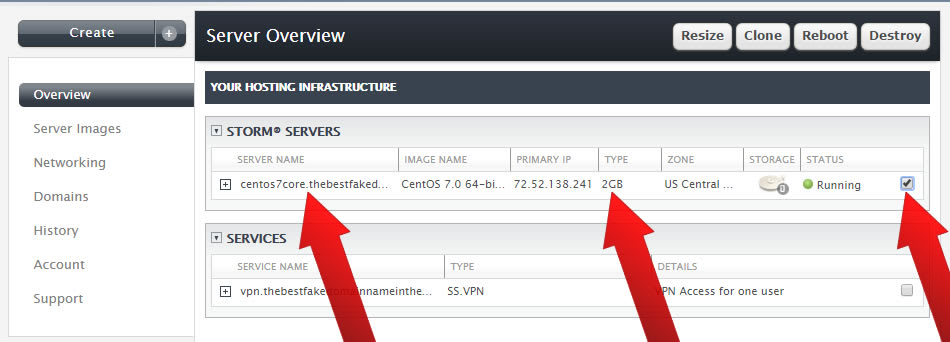
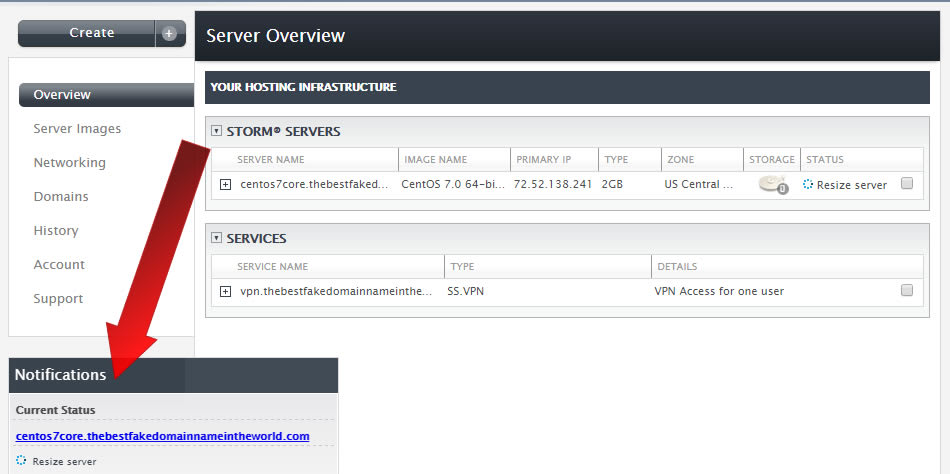
Once you've logged into Manage, you'll be presented with a screen similar to the one below. It will list your VPS and other services by hostname:

In this case I want to upgrade the VPS whose Server Name (hostname) starts with centos7core.thebestfaked... which, as you can see under the column Type, is a 2 GB VPS. Check the box in the Status column to select that server:
Step #2: Select New Server Size
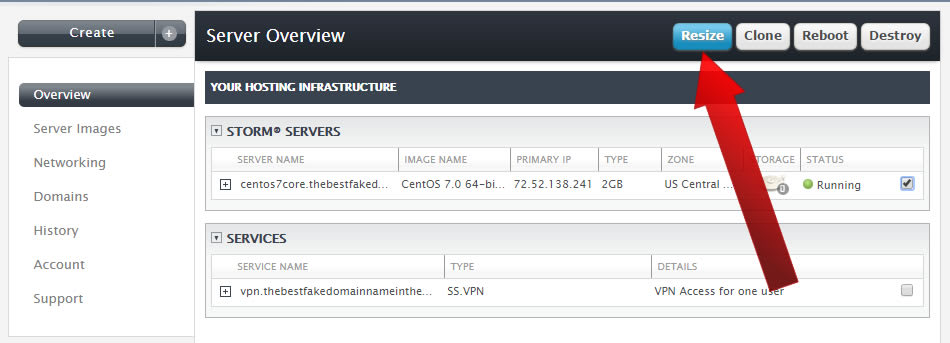
At the top of the page, in the Server Overview row, you now have the option to Resize your VPS. Click Resize!
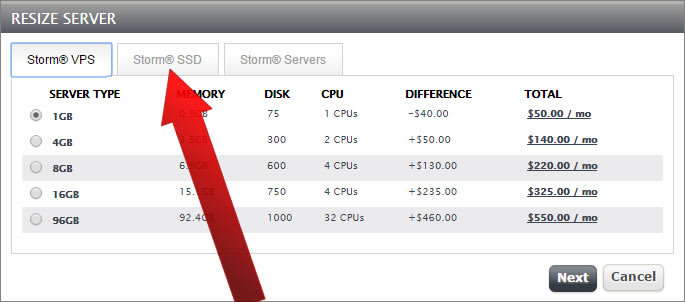
The next screen includes your upgrade options. In this case, I can downgrade to a 1 GB VPS, which I definitely do not want to do, or I can upgrade to a 4 GB, 8 GB, 16 GB, or 96 GB VPS, which would all be excellent options. Today, however, I actually want to upgrade to a Storm® SSD VPS. Click on Storm® SSD!
Step #3: Resize the Server
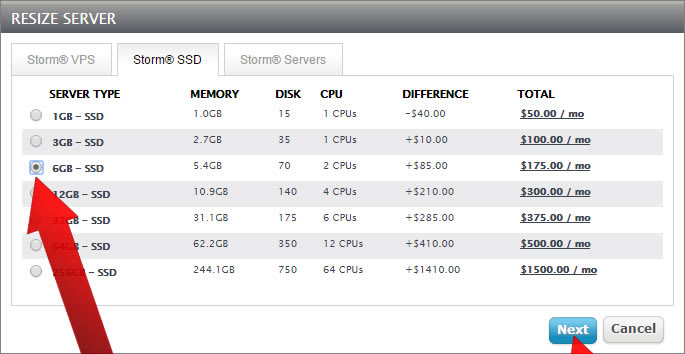
I want the 6 GB Cloud SSD VPS. I've selected it, and now I am going to click Next.
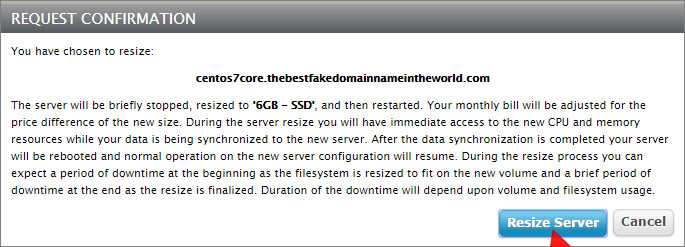
Before the upgrade/resize starts you'll receive a Request Confirmation pop-up dialogue box. Read through the note, and verify that you've selected the right server, and the right server size. Then click Resize Server to begin the upgrade process!
That's it! Now just sit back while Storm® upgrades your server!
The time an upgrade will take can vary based on how busy the server is, how much data there is on the server, etc. In your Storm® Management interface you will see Notifications in the sidebar that will keep you informed regarding the upgrade's status!
We pride ourselves on being The Most Helpful Humans In Hosting™! Our support staff is always available to assist with any issues related to this article, 24 hours a day, 7 days a week 365 days a year.
We are available, via our ticketing systems at support@liquidweb.com, by phone (at 800-580-4986) or via a LiveChat or whatever method you prefer. We work hard for you so you can relax.
Related Articles:


About the Author: David Singer
I am a g33k, Linux blogger, developer, student, and former Tech Writer for Liquidweb.com. My passion for all things tech drives my hunt for all the coolz. I often need a vacation after I get back from vacation....


Our Sales and Support teams are available 24 hours by phone or e-mail to assist.
Latest Articles
How to use kill commands in Linux
Read ArticleChange cPanel password from WebHost Manager (WHM)
Read ArticleChange cPanel password from WebHost Manager (WHM)
Read ArticleChange cPanel password from WebHost Manager (WHM)
Read ArticleChange the root password in WebHost Manager (WHM)
Read Article