


This tutorial will walk you through the steps required to set up a new email account in Mail (aka Mail.app aka MacMail), the built-in email application that comes with Mac OS X.
Please note that the examples provided here are written for Mail version 3.6 which comes with OS X 10.5.7. For instructions in Mail under version 9.1 (El Capitan), visit How To Set up Email in Mac OS X 10.11.
Apple does provide an online step-by-step guide which can help walk you through setting up a new Mail account. The rest of this guide does not incorporate the Apple site, but if you would like to try it please visit this link.
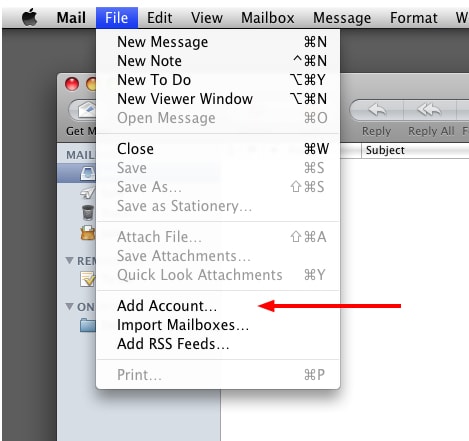
First, open the Mail application. If this is your first time launching Mail it will ask you if you would like to set up an account. If it does not ask automatically you can start the new account wizard by opening the File menu and choosing Add Account.
Time to fill out some basic information:
— Full Name is the name people see in their email clients when you send them a message.
— Email Address is your full address, including the @ symbol and domain name.
Don’t forget to type in your password. Some versions of Mail will let you skip this step and will ask you for the password when first try to check your email after completing the setup wizard.
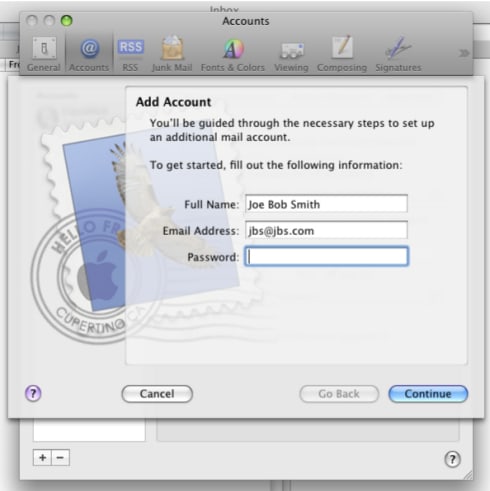
Press Continue.
On the following screen:
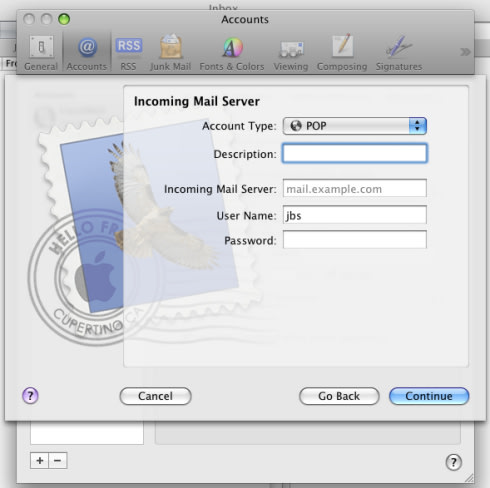
— Description can be anything you want, normally just a short name for the account (ex: my email, my email domainname.com, home email, etc)
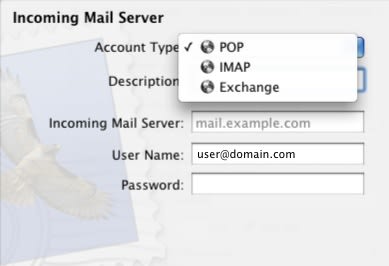
— Account Type can be POP, IMAP, or Exchange. For a standard hosting account we normally recommend IMAP as your mail will be safely stored on the server. POP will download the mail to your local machine, and Exchange is normally only used in business environments where you are operating an Exchange server.
Here you can see the three incoming server types in the menu: POP, IMAP, and Exchange.
— Incoming Mail Server is the server name that you use to check your email.
— Username is your email address. In some cases, you can use just the username (everything before the @ symbol) but to play it safe enter your full email address including the @ symbol and domain name (this is called “full realm authentication”).
Don’t forget to enter your password.
Click Continue.
Now we will set up the Outgoing Mail Server settings:
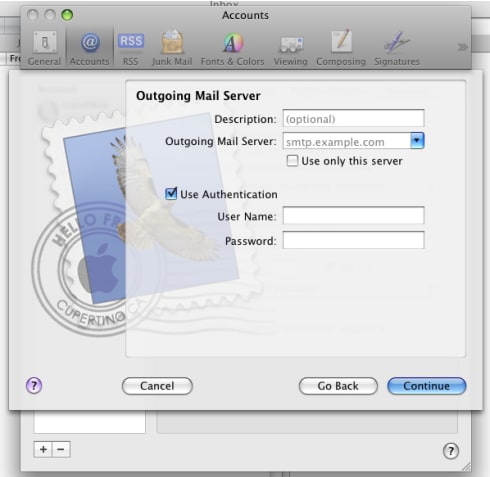
— Description is a label for this outgoing mail server. Because mail can use multiple outgoing mail servers at once it asks you to save it using a name, in this case a description.
— Outgoing Mail Server is the server name that you will use to send your outbound email. Check the box next to Use only this server if you do not plan on setting up any additional outbound servers.
— Check the box next to Use Authentication and enter your full email address with the @ symbol and domain name as well as your password. Please note that outbound authentication is not always required but is strongly recommended if you want your email to remain as trouble-free as possible.
Press Continue.
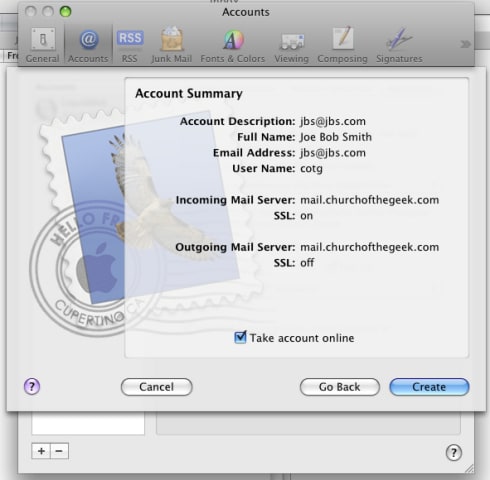
You will see a summary page similar to the one above.
If you leave the box marked Take account online checked and then click Create your new email account will immediately go online and attempt to download your mail on the server.
Note that any of these settings can be changed at a later time by going to the Mail menu bar item, followed by Preferences, and then Accounts.
===
Liquid Web’s Heroic Support is always available to assist customers with this or any other issue. If you need our assistance please contact us:
Toll Free 1.800.580.4985
International 517.322.0434
support@liquidweb.com
https://my.liquidweb.com/
Related Articles:


About the Author: Jay Allen


Our Sales and Support teams are available 24 hours by phone or e-mail to assist.
Latest Articles
How to use kill commands in Linux
Read ArticleChange cPanel password from WebHost Manager (WHM)
Read ArticleChange cPanel password from WebHost Manager (WHM)
Read ArticleChange cPanel password from WebHost Manager (WHM)
Read ArticleChange the root password in WebHost Manager (WHM)
Read Article