


Step #1: Add New Domain
To create a new domain in Plesk 11+ you will click on the Add New Domain button on the Websites & Domains tab (if you use Service Provider view you will need to choose “Manage Hosting” next to the subscription or domain). This will bring you to the Adding New Domain Name page. Here you will be required to determine three things which will be covered in detail below: DNS Settings, Hosting Type, and Hosting Settings.
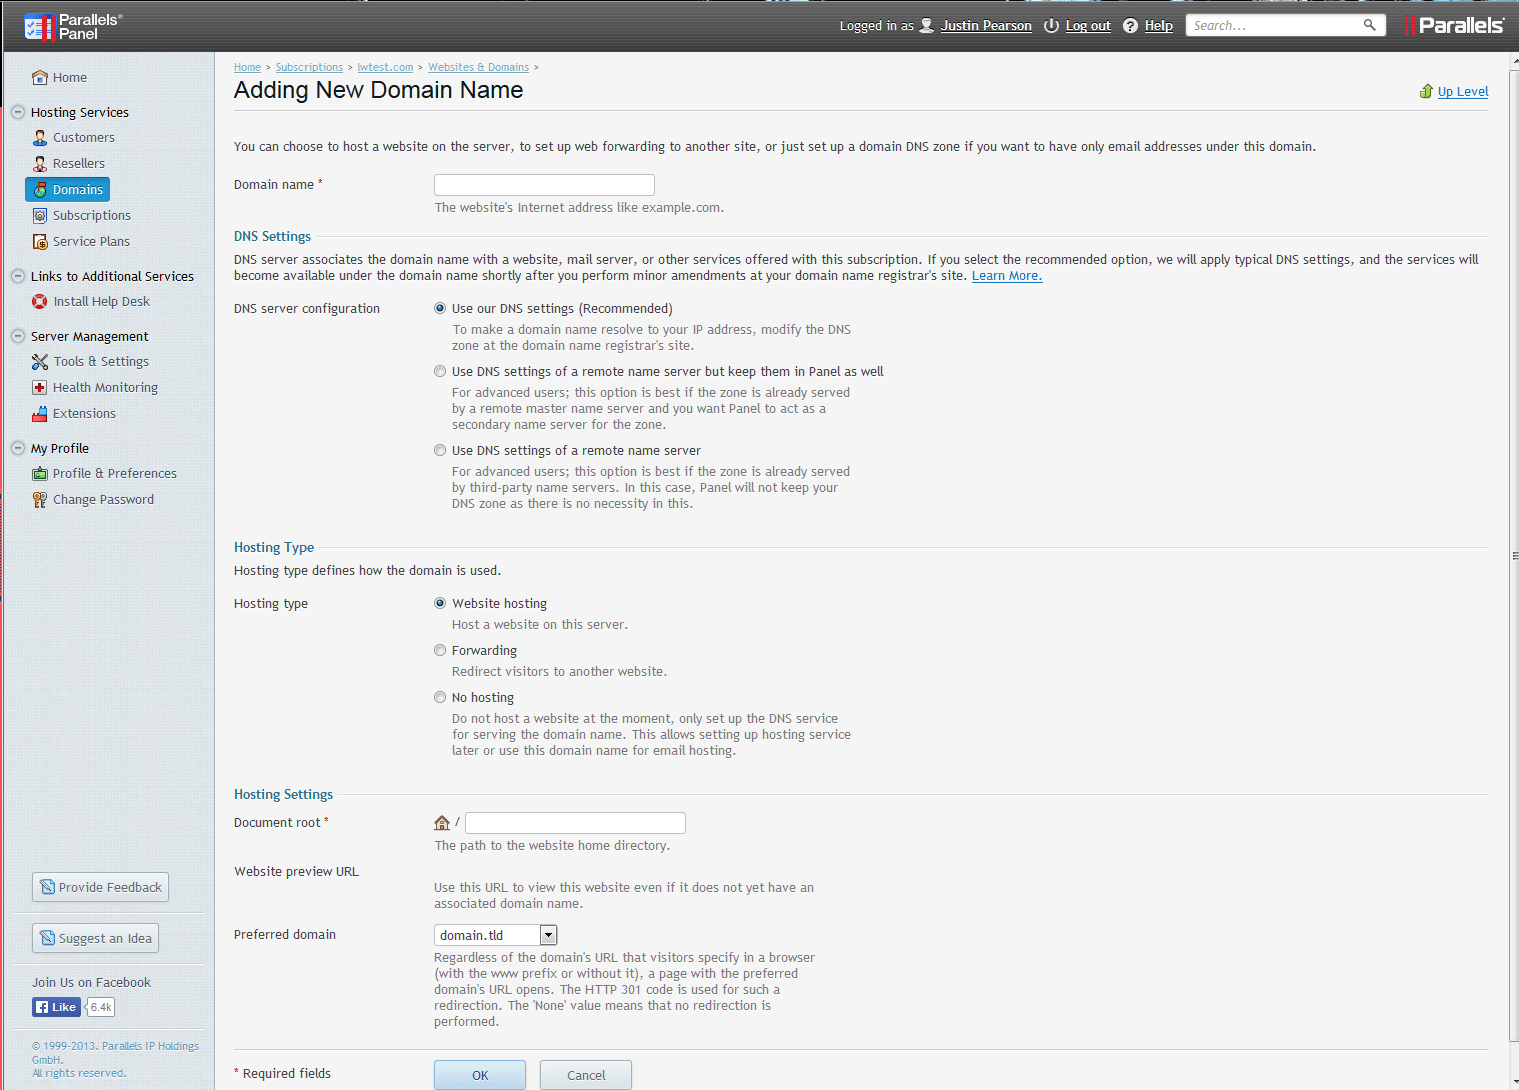
Step #2: DNS Settings
DNS requirements vary from domain-to-domain, as such Plesk has multiple options for setting up DNS.
The first and most common option is Use our DNS settings and is the recommended setting. To use this option you must specify the name server(s) at the domain registrar.
The second and most advanced option is the Use DNS settings of a remote name server but keep them in Panel as well. This option best suited for those who wish to have Plesk host their DNS as a secondary name server and will require that both DNS zones are kept in sync manually.
The final option for DNS server configuration is Use DNS settings of a remote name server. This option is for advanced users and is best if the zone is already served by third-party name servers. In this case, Plesk will not host/manage your DNS zone as the remote name server(s) will be handling this. If your DNS is hosted with Liquid Web, then you can find Liquid Web’s Name Servers in this KB.
Visit this KB for more information on setting up DNS zones with Liquid Web.
Step #3: Set Hosting Type
Hosting Types are used by Plesk to configure particular sets of options. The first and most commonly used hosting type is Website hosting; this option will allow you to host a website and email.
The next option, Forwarding, will allow you to redirect traffic from one site to another. This option is useful if you would like to send traffic to another site that is served by a different server.
The last option is No hosting which allows you to host DNS and email, but not a website.
Step #4: Set Hosting Settings
Depending on the Hosting type chosen you may have these additional settings:
If Website hosting was chosen, you will need to set the site’s Document root and Preferred domain. The document root is the location in which the website files exist (typically left blank by default). The Preferred domain option allows you to force the website to be redirected. This is used for SEO (Search Engine Optimization) purposes and can automatically perform a 301 redirect to the chosen domain.
If Forwarding was chosen, you will need to set the destination address and the forwarding type. The destination address is the URL in which traffic will be sent to. The forwarding type explains how the forward is done. Typically standard forwarding with a 301 redirect is the default option, although frame forwarding can be used to mask the destination URL.
Related Articles:
- Managed Server vs. Unmanaged Server Defined
- Change cPanel password from WebHost Manager (WHM)
- Blocking IP or whitelisting IP addresses with UFW
- Fail2Ban install tutorial for Linux (AlmaLinux)
- How to set up NGINX virtual hosts (server blocks) on AlmaLinux
- Integrating Cloudflare Access with a Bitwarden instance


About the Author: J. Mays
As a previous contributor, JMays shares his insight with our Knowledge Base center. In our Knowledge Base, you'll be able to find how-to articles on Ubuntu, CentOS, Fedora and much more!


Our Sales and Support teams are available 24 hours by phone or e-mail to assist.
Latest Articles
Managed Server vs. Unmanaged Server Defined
Read ArticleChange cPanel password from WebHost Manager (WHM)
Read ArticleChange cPanel password from WebHost Manager (WHM)
Read ArticleChange cPanel password from WebHost Manager (WHM)
Read ArticleChange the root password in WebHost Manager (WHM)
Read Article