


How to Configure Your DNS for CloudFlare
II. How to Configure Your DNS for CloudFlare
III. How To Configure Your Server to Log Real Visitor IPs
IV. Exploring the CloudFlare Dashboard
Pre-Flight Check
- This article assumes that you have already set up CloudFlare and added your domain.
- We’ll be adding DNS records in Liquid Web’s Manage dashboard. If your site isn’t using Liquid Web’s nameservers, you’ll need to make changes at your registrar or DNS provider.
- We’ll be using cPanel to set up an .htaccess redirect. If you don’t have access to cPanel, you will need to edit your .htaccess file directly; if you’re using a web server other than Apache (such as Nginx or IIS), you’ll need to set up the redirect manually. You can find tips for doing so in the bonus content section of this article.
Step #1: Get Your CloudFlare DNS Settings
- Once your site has been added to CloudFlare via Manage, select Domains from the left menu, click on the CloudFlare tab and click the [+] button next to your domain name to expand the CloudFlare dashboard.
- Now click on the DNS Settings link near the bottom-right corner to view your settings.

- The popup window will show you the specific changes you’ll need to make for your site:
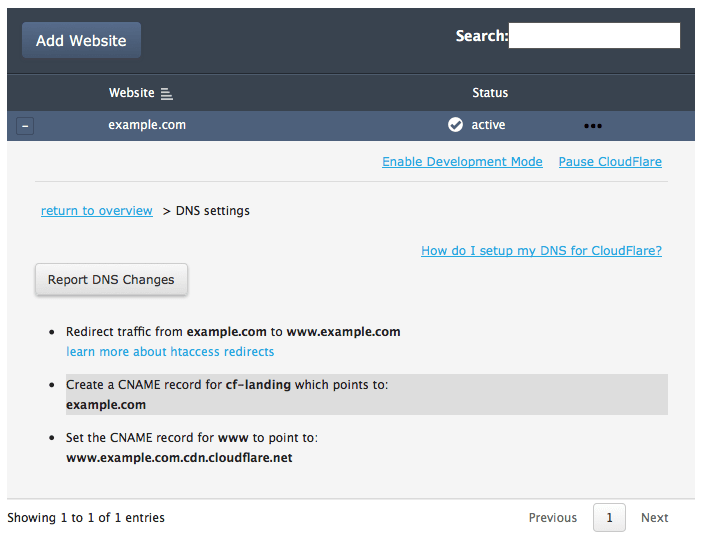 Specifically, you’ll need to:
- Add an .htaccess redirect to ensure all traffic to your site uses the “www” subdomain.
- Add a CNAME record for the subdomain “cf-landing.yourdomainname.com”.
- Change your CNAME record for the “www” subdomain to point to “www.yourdomain.com.cdn.cloudflare.net”.
Step #2: Redirect Traffic to Your ‘www’ Subdomain
If you have access to cPanel, setting up the redirect is a simple process using the method detailed below. If you don’t have access to cPanel, though, you’ll need to set up the redirect manually. You can find tips for doing so in the bonus content section of this article.
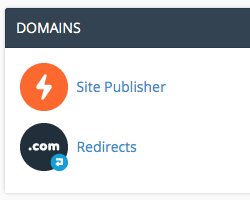
- Log into your site’s cPanel and click on the Redirects icon.
- You’ll set up the redirect on this page:
- Set the Type of redirect to “Permanent (301)”.
- Select your domain name from the http:// dropdown menu.
- Leave the / field blank.
- In the Redirects to field, enter the full URL to which you want to direct traffic. As shown below, it must include both the protocol and “www” subdomain. In this case, we want to redirect traffic for “http://example.com” to “http://www.example.com”, so we’ve put “example.com” in the http:// field and “http://www.example.com” in the Redirects to field.
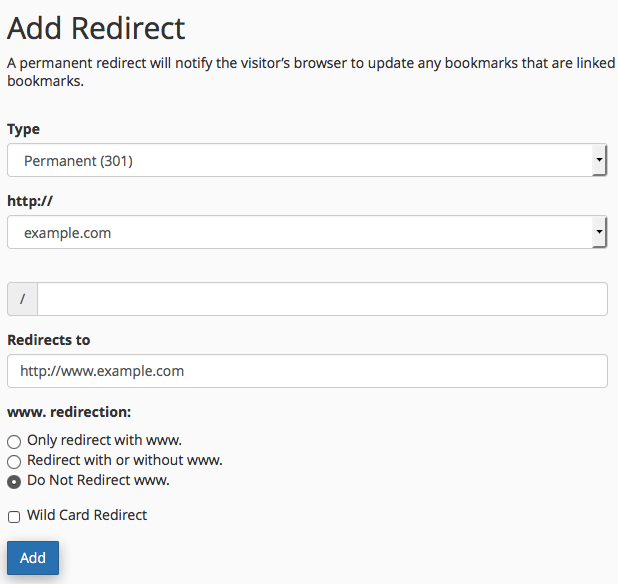
- Once done, click the Add button at the bottom to put the redirect in place and move on to the next step.
Step #3: Add the CloudFlare Landing Page Record
- In your Manage dashboard, select Domains from the left menu, then click on the DNS tab to see a list of your domains.
- Now click the [+] to the left of your domain name to display all of its DNS records.

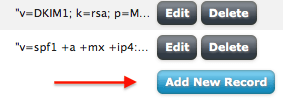
- Click the Add New Record button in the bottom right to add the new record.
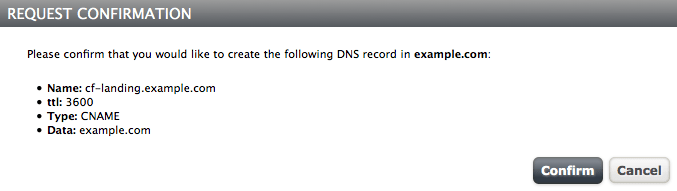
- We want to add a CNAME record for the CloudFlare landing subdomain, so enter “cf-landing” into the NAME field, select “CNAME” for the TYPE field, and set the TTL field to a reasonable value. TTL, or Time To Live, tells DNS servers how frequently to look for changes to the record. The value is listed in seconds, 3600 (one hour) is typically sufficient. Once done, click the green checkmark button to add the record.

- Review the record details in the popup window to make sure they match the values provided by CloudFlare, and click the Confirm button to add the record.
Step #4: Change the Data Field Value for Your ‘www’ Subdomain
- Locate the entry for your “www” subdomain and click the Edit button to change its value.

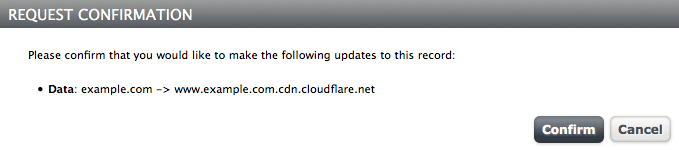
- In the DATA field, change the current value from your domain name to the value provided by CloudFlare. In this case, we’re replacing “example.com” with “www.example.com.cdn.cloudflare.net”. Because this is an existing record, DNS will abide by the record’s current TTL value; lowering it at this point likely will not speed up propagation, but you may want to check that it has a reasonable value.
 Once you’ve entered the correct value, click the green checkmark button.
 - Finally, review the values presented on the popup window, and then click the Confirm button to add the record.
- Once CloudFlare sees the DNS changes you’ve made, web traffic to your site will be routed through its servers. Note that it can take up to 24-48 hours for the DNS changes you made to fully propagate across the Internet, but in many cases you will see the changes take effect much more quickly.
Next Step: Configure Visitor Logging
Because CloudFlare acts as a proxy, sitting between your website and the rest of the Internet, your server will, by default, log all visits to your site as having originated from CloudFlare. Fortunately it is a simple matter to configure your web server so that site visitors’ actual IP addresses will be logged. Proceed to Part Three to get started.
Bonus: Domain Redirects for Sites Without cPanel
If you don’t have access to cPanel or are using a web server other than Apache, you’ll need to set up the “www” redirect manually. These instructions cover the general steps for popular web servers:
Apache
Apache redirects are accomplished via .htaccess files. The one you’ll need to edit will be located in your web site’s root directory, but you may need to check a box in your FTP client to show hidden files in order to see it. If you don’t already have a file named “.htaccess” in your site’s main directory, you’ll need to create one.
To redirect your non-www domain to www, simply add these lines at the beginning of your .htaccess file:
RewriteEngine on

RewriteCond %{HTTP_HOST} !^www.

RewriteRule ^(.*)$ http://www.%{HTTP_HOST}/$1 [R=301]
IIS
The non-www to www redirect can be made in IIS by adding the following redirect to the site’s web.config file:
<rule name="WWW Redirect" enabled="true" stopProcessing="true">

<match url="(.*)" ignoreCase="true" />

<conditions>

<add input="{HTTP_HOST}" negate="true" pattern="^www.(.+)$" />

</conditions>

<action type="Redirect" url="http://www.{HTTP_HOST}/{R:0}" appendQueryString="true" redirectType="Permanent" />

</rule>
Nginx
Nginx redirects may be configured in the site’s virtual host (.vhost) file or main configuration file, depending on the server version and operating system. Since Nginx is not supported by Liquid Web, we’re assuming that you already know how to edit the virtual host configuration.
To redirect your non-www domain to www, you’ll need to ensure that the primary server is configured to use only the “www” subdomain for its server name.
First, back up the configuration file and then locate the server block for your domain. If both the www and non-www versions of your domain name are listed in the same server block, remove the non-www reference to your site from that server name line. Then create a separate server block for the main, non-www, domain, similar to this one:
server {

listen       80;

server_name  yourdomainname.com;

return       301 http://www.yourdomainname.com$request_uri;

}
This will direct all traffic directed at your site’s main domain to the www version of your domain name. Once you’ve finished, restart nginx for the change to take effect.
Related Articles:


About the Author: dpepper


Our Sales and Support teams are available 24 hours by phone or e-mail to assist.
Latest Articles
How to use kill commands in Linux
Read ArticleChange cPanel password from WebHost Manager (WHM)
Read ArticleChange cPanel password from WebHost Manager (WHM)
Read ArticleChange cPanel password from WebHost Manager (WHM)
Read ArticleChange the root password in WebHost Manager (WHM)
Read Article